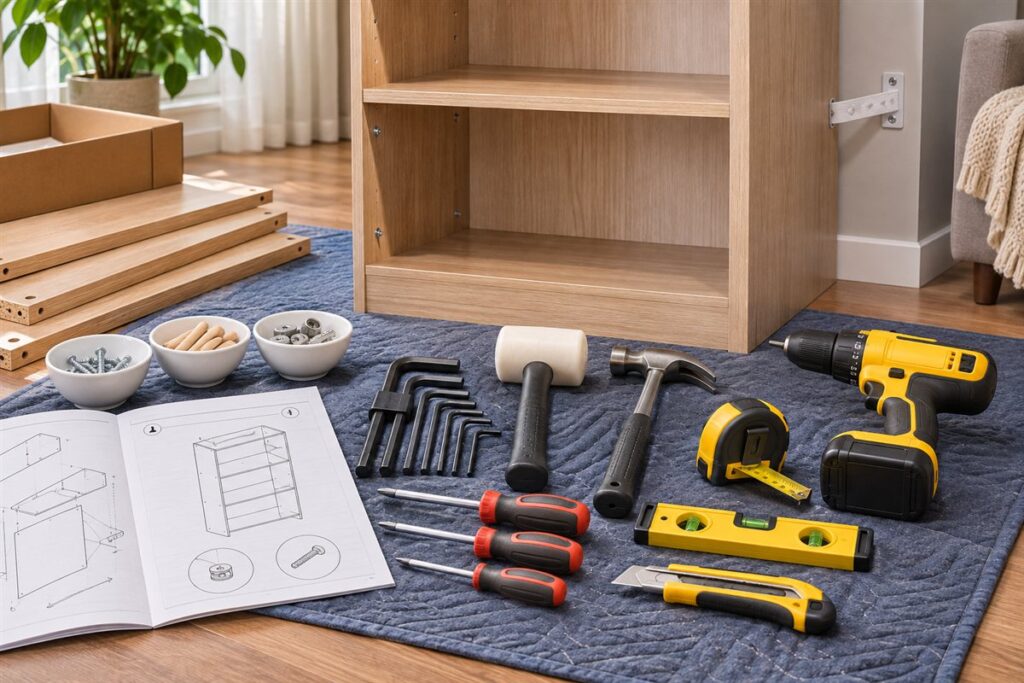
Most flat-pack furniture can be built with a few basic hand tools, and the small included hex key is rarely the best choice. A proper screwdriver set, a rubber mallet and a clear work area will make the job faster and reduce damage to the parts.
The Tools Worth Having
- A screwdriver with cross-head and slotted tips in several sizes.
- A set of hex keys, ideally with a long arm for leverage.
- A rubber or soft-faced mallet for dowels and cam pins.
- A small hammer for back panel nails.
- A tape measure and a short spirit level.
- A utility knife for opening packaging, used with care.
- A cordless driver with a low torque setting, if you have one.
If you use a power driver, set it to a low torque or finish by hand. Overtightening can strip holes in the particle board and crack parts. Check the furniture maker’s instructions for any limits.
Set Up Before You Begin
- Clear a flat space larger than the biggest panel and lay down a blanket or the carton to protect finishes.
- Unpack and sort parts. Group fasteners into small bowls and match them to the parts list.
- Read the whole instruction sheet once before touching a screw.
- Check that every part is present and undamaged. Contact the seller if anything is missing.
Good light and a clear floor make a bigger difference than most people expect. If you are working in a small room, build in the room where the piece will live when you can, because large finished items may not fit through doors and stairwells.
Assembly Habits That Help
Hand-tighten fasteners first, then do a final snug pass once the frame is square. This leaves room for small adjustments. Keep the orientation of each panel in mind, because many parts look alike but have holes on only one side. If a hole does not line up, stop and recheck the step instead of forcing it.
Tall items such as bookcases and chests of drawers can tip. Follow the maker’s anchoring advice and use fixings suited to your wall type. If you are unsure about wall construction, ask a qualified professional.
A Worked Walkthrough: Building a Simple Bookcase
Most flat-pack pieces follow the same pattern, so this example applies broadly. Always defer to your own instruction sheet where it differs.
- Lay out the sides, shelves, top and back panel on the floor, and match each to the parts list.
- Count and sort fasteners into bowls by type, and set aside any spare ones.
- Fit cam pins or dowels into the shelf ends first, tapping them gently with the mallet so they sit flush.
- Join one side to the shelves loosely, then add the second side, keeping the whole frame lying down while you work.
- Tighten cam locks or screws in small turns, moving around the frame so no single corner is fully tight before the rest.
- Check that the frame is square by comparing the two diagonals with a tape measure. Equal readings suggest a square frame.
- Fit the back panel with its small nails or screws, working from the middle outward, because it helps hold the frame square.
- Stand the piece up with a helper if it is large, adjust the feet, check it with the level and fix it to the wall as the maker directs.
Common Problems and Quick Fixes
| Problem | Likely cause | What to check |
|---|---|---|
| Wobbly frame | Loose fasteners or uneven floor | Tighten gradually, check levelling feet |
| Doors not aligned | Hinges set unevenly | Adjust hinge screws in small steps |
| Stripped screw hole | Overtightening | Consult the maker’s guide for repair advice |
| Back panel will not sit flat | Frame is out of square | Loosen fasteners slightly and compare diagonals |
| Cam lock will not turn | Pin not fully seated or wrong direction | Check the pin depth and the arrow on the cam |
Take a short break once the main frame is built. Stepping back often shows an upside-down panel or a missing washer before the glue or the final fasteners make it hard to correct. Keep the instruction sheet and spare fasteners in a labelled bag, since you may need them if you move the furniture later.
Common Scenarios
Building alone in a small room
Work on the floor with the carton flattened beneath the panels. Stand the piece up last, and ask for a helper for anything tall or heavy.
A rented home
Wall anchoring still matters for tall items. Ask the owner or a qualified professional about fixings that suit the wall and the tenancy rules.
Furniture with drawers
Assemble the frame first, then the drawers, then fit the runners as instructed. Check that each drawer slides freely before final tightening.
A piece with a missing part
Stop and contact the seller with the part number from the sheet. Do not improvise with fasteners that are not meant for the job.
Mistakes to Avoid
- Fully tightening early. Fasteners locked on the first step leave no room to line up later panels.
- Forcing parts that will not fit. This splits particle board, and the damage cannot be reversed.
- Mixing up similar screws. Different lengths hold differently, and the wrong one can poke through a panel.
- Discarding the packaging too soon. If you have to return a part, you may need the original carton.
- Leaving tall furniture unanchored. A piece that is stable when empty may tip under a load or when a child climbs it.
Care and Upkeep Over Time
Flat-pack furniture relies on small fasteners that can loosen as the piece is used, moved or exposed to changes in humidity. Check the fasteners every few months, tightening any that have worked loose with a hand tool rather than a power driver. Do this before a wobble puts extra strain on the joints. When you move house, take drawers out and pack small parts in labelled bags, then tape the bag to the piece. If a screw hole has worn, the maker may recommend a repair method, so look at the guide rather than improvising. Wipe surfaces with a cloth suited to the finish, as the maker advises, and avoid soaking particle board, which swells when it gets wet.
FAQ
Is a power driver faster than a hand driver?
Usually, but it is easier to overtighten. Use a low torque setting and finish by hand.
Can I reuse furniture parts after taking it apart?
Often yes, but fastener holes in particle board can wear. Follow the maker’s guidance for moving or reassembling.
Do I need a helper?
For anything large or tall, yes. Many instruction sheets mark steps that need two people, and following them protects both you and the piece.
Why is my frame not square?
Fasteners may have been fully tightened too early, or a panel may be the wrong way round. Loosen the joints a little, check the diagonals and tighten again in small steps.
What should I keep after building?
Keep the instruction sheet, spare fasteners and the included key in a labelled bag. They will help if you need to move or repair the piece.
The Short Version
A decent screwdriver, hex keys, mallet and level cover almost every flat-pack job. Work in a clear space, tighten gradually, and anchor tall pieces as the maker directs. Keep the sheet and spares for later.