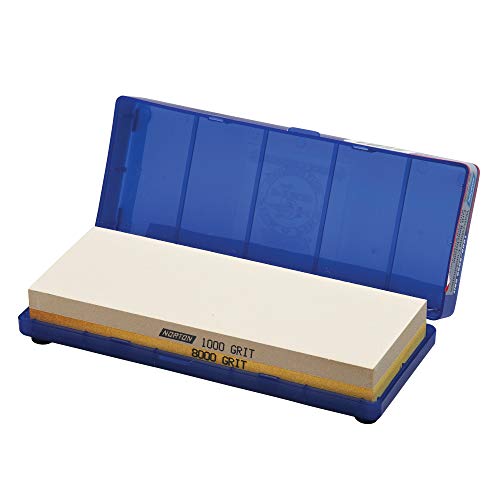
A kitchen sharpener keeps your everyday knives cutting cleanly. The choices include whetstones that grind a new edge, honing rods that realign a bent one and handheld tools that do a bit of both. Which is right depends on how much practice you want, how sharp you need your knives to be and how often you cook. A busy home kitchen usually benefits from one honing tool for the week and one sharpening tool for the month.
The six tools below cover whetstones, rods and a simple handheld sharpener. We have not used these products ourselves, so confirm grit, length and the knives each tool suits on the current listing before buying. A honing rod does not replace sharpening, so some cooks use one of each.
As an Amazon Associate we earn from qualifying purchases. Links below are affiliate links, and they do not change the product information we give.
What to Look For
| Feature | Why it matters |
|---|---|
| Tool type | Stones sharpen, rods hone, and handheld tools combine both in a simple form |
| Grit | Coarse grits repair a dull edge; fine grits polish it |
| Length | A longer rod or stone gives more room for a full blade stroke |
| Material | Steel, ceramic and diamond-coated rods behave differently on harder blades |
| Base and grip | A stable base or comfortable handle keeps your hands safe |
In this guide
Specs at a Glance
| Tool | Type | Material | Notes |
|---|---|---|---|
| AccuSharp Knife and Tool Sharpener | Handheld | Tungsten carbide | Quick pulls; no setup |
| Sharp Pebble Whetstone | Whetstone | Abrasive stone | Dual-grit stone with a base, per the maker |
| Shun Combination Whetstone | Whetstone | Abrasive stone | Made by a knife brand |
| Wusthof Honing Steel | Honing rod | Steel | Made for realigning edges |
| Idahone Ceramic Sharpening Rod | Honing rod | Ceramic | Fine ceramic finish |
| Victorinox Fibrox Sharpening Steel | Honing rod | Steel | Comfortable handle |
The 6 Best Kitchen Sharpeners
Top pickBest for fast kitchen sharpening
1. AccuSharp Knife and Tool Sharpener
A small handheld sharpener with a tungsten carbide blade, designed to sharpen with quick pulls along the knife. It is a fuss-free pick for busy kitchens, and it is also marketed for outdoor and garden tools.
Suits: fast kitchen sharpening. Strengths: no setup and a compact size. Weaknesses: it removes metal quickly. Skip it if you own fine knives you want to protect.
View AccuSharp Knife and Tool Sharpener on Amazon
Best for learning whetstone sharpening
2. Sharp Pebble Premium Whetstone
A two-sided whetstone sold with a base and guides, designed for beginners learning stone sharpening. The dual grits allow both repair and refining, so one stone covers a dull knife and the final polish.
Suits: learning whetstone sharpening. Strengths: two grits and a stable base. Weaknesses: stones need soaking and technique. Skip it if you want a pull-through tool.
View Sharp Pebble Premium Whetstone on Amazon

Best for owners of quality knives
3. Shun Combination Whetstone
A whetstone from a well-known Japanese knife brand. It is meant for sharpening quality knives, and the combination design offers more than one grit.
Suits: owners of quality knives. Strengths: a trusted knife-maker brand. Weaknesses: needs practice to get a steady angle. Skip it if you want instant results.


Best for weekly upkeep of Western knives
4. Wusthof Honing Steel
A long steel rod from a German knife maker, built to realign the edge of Western-style knives between sharpenings. It keeps a blade performing longer between sessions.
Suits: weekly upkeep of Western knives. Strengths: a quality brand and a familiar tool. Weaknesses: it does not remove metal like a stone. Skip it if you need to repair a dull blade.

Best for harder, finer knives
5. Idahone Fine Ceramic Sharpening Rod
A ceramic rod that offers a fine finish and light abrasion. Ceramic suits harder blades that steel struggles to realign, and the fine surface leaves a clean finish.
Suits: harder, finer knives. Strengths: a smooth finish and a long rod. Weaknesses: ceramic can chip if dropped. Skip it if you prefer a steel rod.
View Idahone Fine Ceramic Sharpening Rod on Amazon
Best for everyday home cooks
6. Victorinox Fibrox Sharpening Steel
A honing steel from a Swiss maker, with a grippy handle designed for comfortable use. It is a plain, practical tool for keeping an edge aligned between sharpening sessions, and it suits most straight-edge kitchen knives.
Suits: everyday home cooks. Strengths: comfortable handle and a trusted maker. Weaknesses: it only hones. Skip it if you need real sharpening.
View Victorinox Fibrox Sharpening Steel on Amazon
Care and Setup
- Soak whetstones only if the maker says to.
- Keep the angle steady with light, even strokes.
- Rinse stones and wipe rods after each use.
- Dry your knife before putting it away.
- Store rods in a drawer protector or knife block.
Mistakes to Avoid
- Using a honing rod as if it were a sharpener.
- Pressing hard on a whetstone.
- Dropping a ceramic rod on a hard floor.
- Using a coarse grit on a knife that only needs honing.
- Letting a stone dry unevenly.
Understanding the Grit Ladder
Grit numbers on stones and rods look like technical trivia, but they decide what a tool can do for you. Once you understand the scale, listings become much easier to read.
Grit describes the size of the abrasive particles. A low number means large, coarse particles that cut fast and leave a rough surface. A high number means fine particles that cut slowly and leave a smooth, polished edge. Think of sandpaper: coarse paper takes off material quickly, and fine paper finishes the surface. A sharpening job usually works up the ladder, starting with a coarse grit to repair or reshape the edge and finishing with a finer grit to refine it.
In broad terms, the ranges mean different things:
- Coarse grits: used to repair chips, fix a very dull edge or change the edge angle. They remove a lot of metal, so use them rarely.
- Medium grits: the workhorse range for regular sharpening of most kitchen knives.
- Fine grits: used to refine the edge for smooth, clean slicing.
- Very fine grits: used for polishing, mainly for those who want a mirror-like edge on high-quality knives.
Combination stones put two grits on one block, usually a lower one on one side and a finer one on the other. That is convenient for a home cook, since a single stone can sharpen and refine. If you want to keep the cost down, a medium-and-fine combination is a good starting point. Check the listing to see the actual grit numbers, since descriptions like “fine” differ between makers. Remember that a hard steel knife often benefits from a finer finish, while a softer steel may not hold a polished edge for long.
Whetstone Technique Step by Step
Whetstones have a reputation for being difficult, but the core technique is simple. The skill lies in holding a steady angle and using a light touch.
First, prepare the stone. Follow the maker’s directions on whether it needs soaking or only a splash of water, and place it on a non-slip base or a damp towel so it cannot move. Find the edge angle you want to use. A common way for beginners is to rest the blade flat on the stone, then lift the spine until the edge touches the stone at the angle you want. You can use a stack of coins or a small guide to judge the height of the spine for a consistent angle.
Next, sharpen. With light pressure, push the blade across the stone from heel to tip, in a sweeping motion that covers the entire edge. Work one side until you feel or see a small burr, a thin lip of metal, along the opposite side of the edge. Then flip the knife and repeat on the other side. Move to a finer grit, and reduce pressure as you go. Finish with a few very light strokes to remove the burr, then wipe the blade clean.
- Keep your fingers behind the edge and away from the path of the blade.
- Maintain the same angle for the whole stroke, even at the tip, where it tends to lift.
- Use the full surface of the stone to wear it evenly.
- Rinse the slurry off the blade and stone between grits.
- Test the edge on paper or a tomato.
Expect your first sessions to be slow. Practice on an older knife you do not mind scratching before you move to your good ones.
Honing Rod Material and Technique
A honing rod keeps an edge working between sharpenings, but the right rod depends on what your knives are made of. Using the wrong material can be ineffective or, in some cases, harmful.
A smooth steel rod realigns a bent edge with very little abrasion. It suits softer, tougher knife steels, such as those found in many Western-style knives. A ridged or grooved steel has fine lines that give it a bit more bite, which can help with slightly dull edges. A ceramic rod is harder and has a fine abrasive surface, so it removes small amounts of metal as it hones. It suits harder knives, but it can chip or break if dropped. A diamond-coated rod is the most aggressive, and it acts more like a fine sharpener than a hone. Use it sparingly and lightly.
Technique is the same for most rods. Hold the rod steady, either vertically with the tip on a stable surface or horizontally in front of you with the tip pointing away. Place the heel of the knife against the rod at the angle of the edge, then draw the knife down and across the rod, heel to tip, with light pressure. Alternate sides, using the same number of strokes on each. A few strokes are enough. If you press hard or use a steep angle, you can damage the edge.
- Match the rod length to your longest knife, so you have room for a full stroke.
- Check that the rod suits the hardness of your knife.
- Choose a handle with a guard for safety.
- Keep the rod clean, and wipe away metal particles.
Consider a guide or a practice session with a cheap knife if you are nervous about the angle. With a little care, honing becomes a quick routine that takes less than a minute.
Stone Prep, Flattening and Storage
A whetstone is a consumable tool that wears with use. Looking after it keeps it flat and effective, which in turn makes it easier to hold a steady angle.
As you sharpen, the center of the stone wears faster than the edges and a dip forms. A dished stone makes it harder to sharpen evenly, because the blade rocks across the hollow. To correct this, flatten the stone with a flattening plate or a similar tool, following the maker’s guidance, until the surface is flat again. A quick check is to draw pencil lines across the stone’s surface and rub it on the flattening tool; when the lines are all gone, the stone is flat.
Whether to soak depends on the stone. Some require soaking, while others only need a splash, and some are never to be soaked. The maker’s instructions override general advice, so check the listing or the manual. After use, rinse the stone and let it dry fully in a ventilated place before storing it, since a damp stone stored in a closed box can grow mold or crack in cold conditions. Keep the stone away from freezing temperatures if it has absorbed water.
- Store stones in a dry place, with air circulation.
- Keep a stable base, so the stone does not slide or tip.
- Clean slurry and metal from the surface after each session.
- Avoid dropping the stone, since it can chip or crack.
- Use a stone holder or non-slip mat for safety.
Ceramic and steel rods need less care, but wipe them down after use. Replace a rod when its surface looks glazed or no longer takes effect. A well-kept stone can serve for years, so a bit of regular maintenance pays off.
Building a Routine That Fits Your Kitchen
The right combination of tools depends on how you cook, what knives you own and how much effort you want to invest. A routine is more valuable than any single product.
For a busy household that wants minimal fuss, a honing rod for weekly care and a simple sharpening tool for occasional use is a practical pairing. The rod keeps the edge aligned, and the sharpener restores it when honing no longer works. For a cook who enjoys the craft and owns quality knives, a combination whetstone and a ceramic or steel rod gives control and excellent results, at the cost of time and practice. For someone who wants quick, repeatable results and does not want to learn a technique, a handheld sharpener or a guided system may fit better, as long as the knives are not delicate.
Consider these questions when you plan:
- How many knives do you actually use? Often it is only two or three.
- How sharp do you need them to be? A paring knife and a bread knife have different needs.
- Do you have a stable space to sharpen safely?
- Will you actually use the tool, or will it end up in a drawer?
Budget tiers describe different trade-offs. Low-cost tools are accessible but may be less refined. Mid-range stones and rods usually give a good balance. Premium options offer a finer finish and more durable materials. Whichever you choose, set a reminder for how often you plan to sharpen and hone. Ask about returns, in case a tool is not a good fit for your knives, and check that the product lists the knife types it supports.
Which kitchen sharpener should you buy?
The best kitchen sharpener is the one that matches your knives and the effort you are willing to put in. Whetstones sharpen, rods hone and the handheld tool does a quick version of sharpening, so start with what your knives need.
- If you want the fastest, simplest result: choose the AccuSharp Knife and Tool Sharpener. It needs no setup, but it removes metal quickly, so it is not the tool for fine knives you want to protect.
- If you want to learn stone sharpening: choose the Sharp Pebble Premium Whetstone. The two grits and base are meant for beginners.
- If you own quality knives and enjoy the craft: the Shun Combination Whetstone gives you more than one grit from a knife-maker brand, though it takes practice to hold the angle.
- If you use Western-style knives and want weekly upkeep: the Wusthof Honing Steel realigns the edge between sharpenings.
- If your knives are harder: the Idahone Fine Ceramic Sharpening Rod has a fine ceramic finish, but it can chip if dropped.
- If you want a comfortable everyday steel: the Victorinox Fibrox Sharpening Steel has a grippy handle and suits most straight-edge kitchen knives.
A common pairing is one honing tool for regular use and one sharpening tool for the occasional reset. For example, a steel or ceramic rod plus a whetstone covers both jobs. If you want only one tool and your knives are tough, start with the one that matches the problem you have now: a dull edge needs sharpening, a slightly bent edge needs honing.
Use the buttons above to open each listing, then check grit, rod length and the knife types the maker says the tool suits.
What to check before you buy, and who should skip it
Before buying a knife sharpener, check what type of knives you own, the tool’s grit or material and what is included. A mismatch is the most common reason a sharpener ends up in a drawer.
- The listed grit numbers or finish, rather than the word “fine” alone.
- Rod length compared with your longest knife.
- Whether a base, guide or holder is included with a stone.
- Whether the maker says the stone needs soaking.
- Whether the tool suits straight-edge, serrated or hard Japanese-style knives.
- Return terms, in case the tool does not suit your blades.
Be realistic about trade-offs. Whetstones give control but ask for time, a stable surface and a flat stone. Rods are quick but do not repair a truly dull blade. Pull-through tools are easy but remove more metal and give you less say over the edge. Ceramic is fine but brittle.
Who should skip it? If you rarely cook or your knives are already sharp, a single honing rod may be all you need. If you have serrated knives only, most tools here are not designed for them. And if you want a no-effort electric system, this guide’s manual tools are not that.
Compare the picks above, check the current listing for size and what is included, then choose the one that fits how you will sharpen.
How the Six Tools Compare as a Working Kit
These six are less rivals than colleagues, and comparing them means understanding the job each does. The AccuSharp is the quick handheld rescuer, aggressive and fast, suited to utility knives and emergency edges rather than fine work. The Sharp Pebble whetstone is the full freehand route in one stone, the tool that teaches real skill and handles everything from repair to polish, given practice. The Shun combination whetstone is the refined version of that idea, a two-grit stone aimed at owners of good knives who want a considered freehand setup. The Wusthof honing steel and the Victorinox Fibrox sharpening steel are alignment tools: they straighten a tired edge between sharpenings and remove almost no steel. The Idahone fine ceramic rod sits between worlds, aligning and very lightly abrading, which makes it a favourite for maintaining harder, finer edges.
A realistic home kit is often two of these: a stone for true sharpening a few times a year, and a rod or steel for the weekly thirty seconds that keeps the edge honest in between. Buying all six is unnecessary; buying only a steel and expecting it to restore a wrecked edge is the classic disappointment this list helps you avoid.
Choose and skip guidance by experience
Choose a combination whetstone if you are willing to practise a skill that improves for years and serves every knife you will ever own. Choose the Idahone rod if your knives are good and your need is maintenance more than rescue. Choose the AccuSharp for garden, workshop, and utility blades where speed matters more than refinement. Skip the handheld pull-through for your best knives; its aggression is a poor match for fine edges. Skip buying a steel alone if your knives are already dull; a steel maintains, it does not restore.
Whetstone Technique: The Details That Decide the Result
Freehand sharpening succeeds on three consistencies: angle, pressure, and coverage. Hold the angle by locking your wrist and moving from the shoulder, checking the blade’s relationship to the stone rather than trusting feel alone at first. Use pressure like handwriting: firm enough to cut on coarse grit, light enough to refine on fine grit, and always even from heel to tip. Cover the whole edge by working in sections, counting strokes, and confirming the burr forms along the full length before changing sides.
Water management matters on soaking stones. Keep the surface wet and the slurry working for you; a stone that dries mid-session grabs and chatters. Splash, pause, breathe, and continue. Beginners rush because the process looks simple in videos; in person it is a slow craft for the first few sessions, and then suddenly it is not, because the hands learn what the eyes were trying to supervise.
Common freehand faults and their fixes
A convex, dull-feeling edge usually means the angle wobbled higher at the end of each stroke; shorten the stroke and slow down. A scratchy finish means grit contamination, often from not rinsing between stones; clean the blade when you change grit. An edge sharp at the heel and dull at the tip means the tip never truly met the stone at the working angle; give the tip its own counted strokes. Every fault has a mechanical cause, which is good news: mechanical causes have fixes.
Honing Rods and Steels: Getting the Thirty Seconds Right
A honing pass should be brief, light, and controlled. Anchor the rod tip-down on a towel for stability if the in-air method feels unsteady; there is no prize for the theatrical version. Use light pressure and a consistent angle, a few strokes per side, alternating to finish so the edge ends centred. The goal is alignment, not abrasion, so if you are bearing down, you are doing a different, worse job.
Material choice follows your knives. A classic steel suits softer Western edges and pure alignment. A fine ceramic rod adds a whisper of abrasion, useful for harder blades whose edges tire in ways a plain steel cannot refresh. Either way, honing extends the interval between true sharpenings; it never replaces them, and recognising the week when honing stops working is the skill that keeps a kitchen sharp year-round.
Storing stones and rods so they stay true
Dry stones fully before boxing them, store them flat where they cannot be knocked off a shelf, and keep rods in a drawer tray or on a strip where the ceramic cannot chip against other tools. A chipped rod or a cracked stone stops being a precision tool. Flatten stones when a dished surface appears, because a dished stone changes your angle for you, silently, on every stroke.
Building a Sharpening Routine Around Your Cooking
Anchor the routine to your cooking rhythm rather than to an ideal schedule. If you cook most nights, a weekly honing while something comes to the boil, and a stone session every few months on a quiet afternoon, covers nearly everything. If you cook mainly at weekends, hone at the start of the session and sharpen when the tomato test fails two sessions running. Batch your dull knives: sharpening three knives in one setup is barely more work than one, and the repetition within a session rapidly improves your hands.
Keep the kit together in one place, stone, rod, towel, and a marker for the burr check if you use one, so starting takes a minute rather than a search. Convenience is a sharpening tool in itself: the routine that happens is the one that was easy to begin.
Worked Examples: Three Owners, Three Sensible Kits
Consider a beginner who cooks nightly and owns two mid-range knives. The sensible kit is a combination whetstone and nothing else at first, because the stone teaches the skill and restores the edges, and a honing habit can be added later once sharpening itself is understood. This owner should practise on the older or cheaper knife first, accept a scruffy first session, and judge progress by the tomato test across a month rather than by the first afternoon.
Consider an experienced cook with good knives that are maintained well and rarely truly dull. The Idahone ceramic rod is the centre of this kit, with a stone kept for the rare full session. This owner’s edges live in the maintenance zone, and their money is best spent on the rod’s quality and on storage that protects the edges the rod maintains.
Consider a household equipping a workshop, garden, and kitchen from one drawer. The AccuSharp earns its place here for the utility blades that would ruin a fine stone session’s patience, while a modest stone serves the kitchen knives properly. Separating the rough work from the fine work is the insight; one tool asked to do both usually ends up doing the rough work on everything, including knives that deserved better.
The question underneath every kit choice
Ask which job you actually have: rescue, routine sharpening, or maintenance. The six tools divide cleanly by job, and most disappointment comes from buying a maintenance tool for a rescue job or a rescue tool for good knives. Name the job first and the shortlist writes itself.
The Steel, the Stone and the Honest Limits of Each
Harder steels hold an edge longer and take longer to sharpen; softer steels sharpen quickly and tire quickly. Your tools should match your steel’s temperament. A fine ceramic rod that maintains a hard blade beautifully will feel useless on a very soft, badly dulled one, and a coarse handheld that rescues a soft utility blade will gouge a hard, fine edge. None of this is a defect in the tools; it is the physics of abrasion meeting metallurgy, and the owner’s job is pairing, not blame.
Stones wear, rods chip, and handheld elements dull, so every tool in this category has a service life that depends on use. Judge a tool by its performance on your knives, not by its age: when a stone stops cutting and flattening does not restore it, or a rod’s surface is damaged, replacement is maintenance, not failure. Keeping one tired tool at the centre of a kit degrades every knife that passes through it.
Practising without risking your best knife
Every collection, or every charity shop, contains a practice blade. Learn new stones and new techniques on that knife until your angle and pressure are steady, and only then bring the good knives to the stone. This single habit removes most of the fear that stops owners starting with whetstones, because the cost of a clumsy session becomes a dull practice knife rather than a damaged favourite.
From Session to Habit: The Maintenance Calendar
Put sharpening on the calendar the way you would any household task, lightly. A monthly check, edge tested on a tomato, honing if needed, takes minutes and prevents the slow slide into a drawer of dull knives that eventually demands a heroic session. A stone session each season, or whenever the monthly check fails twice running, keeps restoration small. Annual attention to the tools themselves, flattening stones, inspecting rods, completes the cycle.
Households that cook together should share the routine rather than appointing one knife person forever. Two people who can hone safely and recognise a dull edge will keep a kitchen sharper than one expert and one person afraid to touch the stone. Teach the anchored rod method and the tomato test, and the knowledge spreads with almost no effort.
Signs your routine is working
Your knives start cuts without pressure, the rod comes out weekly without being resented, stone sessions are short because edges never fully collapse, and nobody in the house reaches for the worst knife out of habit. When those things are true, the kit, whichever of the six anchors it, has done everything this category of tool can do.
The Language of Edges: Words Worth Knowing Precisely
A few terms, held precisely, make every other sharpening conversation easier. The bevel is the angled surface that meets at the edge. The burr is the thin foil of metal raised on the opposite side during sharpening, and its presence tells you the edge has been reached. Stropping is drawing the edge across leather or a fine surface, trailing, to refine and align it. A wire edge is a burr that was never properly removed, sharp for a day and then suddenly dull, and it is the most common reason a freshly sharpened knife disappoints by the weekend.
Toothy and polished describe finishes, not quality: a toothy edge has microscopic grip that starts cuts in skins and fibres eagerly, while a polished edge glides through delicate food cleanly. Neither is the correct edge in the abstract. The correct edge is the one matched to the knife’s work, produced deliberately, with the burr fully removed, and that sentence summarises most of what these six tools exist to help you do.
Testing vocabulary: what the common tests actually tell you
The paper test tells you about bite and burr remnants. The tomato test tells you about alignment and finish on real food. The thumbnail test, done gently across the edge rather than along it, tells you about evenness. Each test answers one question, and owners who ask the right test the right question stop chasing mysteries. Keep the set of tests small, consistent, and food-based where possible, and your judgement of your own edges will become reliable within a few sessions.
Sharpening Sessions for People Short on Time
The perfect session is the enemy of the sharp kitchen, so design for the time you actually have. Five minutes buys a honing pass on every working knife, or one knife properly touched up on a fine stone. Fifteen minutes buys a full sharpening of one knife, slowly and well. An hour buys the whole drawer, batched, with the stone set up once and each knife worked in turn, which is the most efficient format of all and the one to schedule seasonally.
Keep the kit staged for the five-minute version at all times, rod accessible, towel folded, because the five-minute version is what keeps the hour-long version rare. Time-poor owners do not need simpler standards; they need smaller, more frequent sessions, and tools, the rod above all, that make those sessions nearly effortless to start.
Teaching the household the five-minute version
Show every cook in the house the anchored rod method and the tomato test, once, in person. A household where everyone can maintain an edge will never face a drawer of dull knives, while a household dependent on one person’s hour-long sessions will face it whenever that person is busy. Distributed skill is the real premium feature in this category, and it is free.
The Two-Minute Edge Check Anyone Can Learn
Once a week, give the knife you use most a two-minute check. Look along the edge under good light for bright reflections that betray a flat or rolled section. Test it on a tomato or a sheet of paper, heel, middle, and tip. If it passes, cook on. If it nearly passes, hone it and test again. If it fails honestly, that knife joins the list for the next stone session, and knowing that, precisely and early, is what separates kitchens that are always sharp from kitchens that are always about to be.
Write the check into an existing habit, the Sunday shop, the weekly meal prep, the evening the bins go out, so it happens without willpower. Skills attached to routines survive; skills dependent on remembering do not. This tiny check is the highest-value habit in the entire article, worth more than any single tool on the list, because it is the habit that tells you when every other tool is needed.
Passing the habit on
Teach the check to anyone who cooks in your kitchen, and put the rod where the check happens. A household that can diagnose its own edges will never again suffer the slow, invisible decline into dullness that makes cooking harder and, because dull knives demand force, less safe. Two minutes, weekly, is the entire price of that immunity.
Reading Your Own Progress as a Sharpener
Freehand skill announces its arrival quietly. Your strokes become even in sound, the burr appears where and when you expect it, and edges stop varying from knife to knife within a session. Before that point, expect a honest apprenticeship: a few uneven edges, one knife that teaches you about pressure the hard way, and sessions that run long. None of that is wasted, because the hands are learning a calibration no guide can install, and once installed it serves every blade you will ever own.
Keep one benchmark knife, the one you sharpen most often, and judge yourself against its last session rather than against videos of experts. Progress measured against your own history is accurate and encouraging; progress measured against a professional’s highlight reel is neither. Within a season of regular, small sessions, most home sharpeners cross from hoping to knowing, and their kitchens stay sharp almost without thinking about it.
The virtue of stopping
Learn to stop a session when the edge is right rather than when the abrasives are exhausted. Over-sharpening is the tax on enthusiasm, paid in steel. The test says the edge is done; believe the test, clean the knife, and put the stone away with the session counted a success.
A final word on the quiet craft
Sharpening rewards the same temperament as cooking itself: attention, patience, and respect for simple tools used well. Whether your anchor is a stone, a rod, or a humble handheld kept for the rough work, the craft is identical at heart. Keep the edge honest, keep the tools true, and the knives will repay you at every meal, quietly, for years.
Kitchen Sharpener FAQ
What is the difference between honing and sharpening?
Honing realigns the edge. Sharpening removes metal to create a new one.
Do I need both a stone and a rod?
Many cooks use a rod weekly and a stone occasionally.
Which tool is easiest?
A handheld sharpener is simplest, though stones give better results.
Can I use these on serrated knives?
Check the listing first. Most stones and rods are made for straight edges, and serrated blades often need a tapered tool.
How long does a whetstone last?
With care, a good stone lasts a long time. Flatten it when it dishes out and follow the maker’s guidance.
What do grit numbers mean?
Lower numbers are coarse and remove metal quickly, while higher numbers are finer and polish the edge. Sharpening usually progresses from coarse to fine.
What is a burr and why does it matter?
A burr is a thin lip of metal that forms on the opposite side of the edge when you sharpen one side. Feeling it tells you that you have reached the edge, and you then flip the knife.
Which honing rod is best for hard knives?
Ceramic rods suit harder knives because they are fine and slightly abrasive. They can chip if dropped, so handle them carefully.
How do I keep a consistent angle on a whetstone?
Rest the blade flat, lift the spine to the desired height, use a coin stack or guide to judge it and keep your wrist steady through each stroke.
How do I know my stone needs flattening?
If it has a visible dip, or the blade rocks as you sharpen, the stone is dished. Use a flattening tool as the maker advises.
Can I soak every whetstone?
No. Some need soaking, some only a splash and some should never be soaked. Follow the maker's instructions.
How often should I hone my knives?
Many cooks hone before or after each use or once a week, depending on how much they cook. Sharpen only when honing no longer restores the edge.
Should I buy a whetstone or a honing rod first?
If your knives are dull, buy a whetstone or a sharpener first, because a rod cannot repair a dull edge. If they are still fairly sharp, a rod keeps them that way. Many cooks eventually own both.
Is a handheld sharpener bad for good knives?
Handheld pull-through tools remove metal quickly, so they are better for everyday knives than for fine ones. If you own expensive knives, a stone or professional service gives more control. Check the maker's guidance on knife types.
How do I test if my knife is sharp?
Try slicing a sheet of paper or a ripe tomato. A sharp knife cuts cleanly with little pressure. A dull one slides, tears or crushes.
What angle should I use on a kitchen knife?
The right angle depends on the knife, so check the maker's guidance. Many cooks use a shallow angle and keep it steady with a guide. Consistency matters more than chasing an exact number.
Can I sharpen ceramic knives with these tools?
Not unless the listing says the tool is made for them. Ceramic knives are very hard and can chip. Check the maker's instructions before trying.
How long does a honing session take?
A few strokes on each side usually take under a minute. Use light pressure and keep the angle steady. Stop when the edge feels aligned, and sharpen on a stone only when honing no longer helps.
Can I use a whetstone that has gone out of flat?
You can, but your results will suffer quietly, because the stone’s hollow changes the contact angle as the blade travels. Flattening restores the reference surface your technique assumes, and it takes only a few minutes on a suitable flat abrasive surface.
Why does my knife squeak or chatter on the stone?
Usually a dry surface, too much pressure, or an angle slightly too high so the edge digs rather than glides. Add water, lighten your hand, and lower the angle a touch; the stroke should feel like slicing a thin layer off the stone.
Is a honing steel safe to use if I am not confident?
Yes, with the stable method: rod tip resting on a towel on the counter, blade moving down and across away from your body, light pressure, few strokes. Confidence comes quickly with the anchored version, and there is no need to copy the fast in-air style.
What should I do first with a knife that has not been sharpened in years?
Start coarser than you think, work one side until a burr forms along the whole edge, and accept that the first session is restoration, not maintenance. Finish through finer grit, strop or refine, and then maintain the revived edge with the rod so it never returns to that state.
Can these tools sharpen scissors or serrated knives?
Mostly no, and forcing it risks damage. Serrated edges need specialised attention to each scallop, and scissors need their own geometry. Keep these six for straight edges, and treat serrations and scissors as separate problems with separate solutions.
The Short Version
For a handheld option, the AccuSharp. For learning stones, the Sharp Pebble. For a knife-brand stone, the Shun. For a Western knife rod, the Wusthof. For ceramic finishing, the Idahone. For a comfortable steel, the Victorinox.