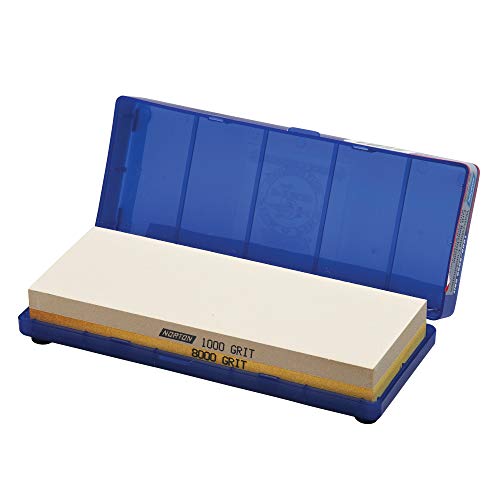
A manual knife sharpener uses hand power, so it needs no outlet and usually takes less space than a machine. Manual tools also remove metal gradually, which many cooks prefer for knives they care about. They also suit people who sharpen only occasionally, since the tools store easily and do not wear out a motor. The right choice depends on the knives you own, how often you sharpen and whether you enjoy the process or just want a sharp knife back quickly.
The six picks below cover pull-through tools, a guided system, a rolling sharpener and a rod system. Some prioritize speed and others prioritize control, so decide whether you want a quick tune-up or a more careful job before you choose. Keep in mind that every manual tool has a learning curve, even if it is a short one. Practice on an old knife first, use light pressure and let the abrasive do the work. Consistent angle and patience matter far more than force, and a few careful sessions usually build the skill quickly. We have not used these products ourselves, so confirm the details on the current listing before you buy.
As an Amazon Associate we earn from qualifying purchases. Links below are affiliate links, and they do not change the product information we give.
What to Look For
| Feature | Why it matters |
|---|---|
| Type | Pull-through tools are quick; guided systems and stones offer control |
| Angle | Fixed angle guides keep strokes consistent for beginners |
| Abrasive | Diamond cuts fast; ceramic polishes; carbide is aggressive |
| Fit | Check blade length, thickness and knife type against the tool |
In this guide
Specs at a Glance
| Sharpener | Type | Abrasive | Notes |
|---|---|---|---|
| Work Sharp Guided Sharpening System | Guided system | Interchangeable plates | Angle guide |
| Brod and Taylor Professional Knife Sharpener | Pull-through | Diamond and ceramic | Two stages |
| AccuSharp Knife and Tool Sharpener | Hand-held pull-through | Tungsten carbide | Finger guard |
| Edge Pro Apex | Guided stone system | Interchangeable stones | Arm and table clamp |
| Tumbler Rolling Knife Sharpener | Rolling system | Magnetic holder | Two disc grits |
| Spyderco Tri-Angle Sharpmaker | Rod system | Ceramic rods | Preset angles |
The 6 Best Manual Knife Sharpeners
Top pickBest for hobbyists wanting repeatable results
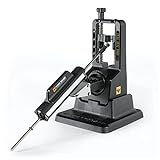
1. Work Sharp Guided Sharpening System
A guided manual sharpener that holds the blade at a chosen angle while you stroke along abrasive plates. It is a step up in control from a pull-through tool.
Suits: hobbyists wanting repeatable results. Strengths: guided angles and swappable plates. Weaknesses: more setup than a pull-through. Skip it if you want an instant fix.
Best for kitchen knives
2. Brod and Taylor Professional Knife Sharpener
A manual sharpener with diamond and ceramic stages in a compact base, designed for use at the counter. It is a known name in kitchen gear.
Suits: kitchen knives. Strengths: clean design and two stages. Weaknesses: limited to fixed angles. Skip it if you own very thin Japanese knives.

Best for quick fixes
3. AccuSharp Knife and Tool Sharpener
A hand-held pull-through tool that is easy to use and tuck away. Carbide cuts quickly, so it suits everyday knives and tools better than delicate blades.
Suits: quick fixes. Strengths: speed and a simple design. Weaknesses: aggressive on fine edges. Skip it if you own premium knives.
View AccuSharp Sharpener on Amazon
Best for enthusiasts
4. Edge Pro Apex
A guided stone system that clamps to a table and lets you move the knife along a stone. It is liked by enthusiasts for the control it gives.
Suits: enthusiasts. Strengths: precise control. Weaknesses: slower to learn. Skip it if you want an instant fix.
Best for gift buyers and tidy kitchens
5. Tumbler Rolling Knife Sharpener
A rolling sharpener where the knife is held by a magnetic base and the blade is sharpened by rolling the tool along. It is known for a clear angle and neat storage.
Suits: gift buyers and tidy kitchens. Strengths: easy angle control and presentation. Weaknesses: best for straight, flat edges. Skip it if you sharpen curved blades.

Best for upkeep
6. Spyderco Tri-Angle Sharpmaker
A rod system with preset angles. It is a respected maintenance tool for pocket knives and many kitchen knives, though not for repairs.
Suits: upkeep. Strengths: simple use. Weaknesses: not for chips. Skip it if you need major repairs.
View Spyderco Sharpmaker on Amazon
Care and Setup
- Clean the abrasive after use.
- Store tools dry and dust-free.
- Replace worn plates or wheels.
- Test the sharpness on paper after finishing.
- Rinse and dry stones or plates, following the maker’s instructions.
- Mark the angle you use so repeat sessions stay consistent.
Mistakes to Avoid
- Applying too much pressure on pull-through tools.
- Ignoring the correct angle for the knife.
- Skipping the finer stage.
- Using a coarse tool too often.
- Choosing a tool before checking which knife types it supports.
Sharpening Basics: Edge Angle, Burr and Abrasive Grit
All sharpening comes down to removing a little metal so that two faces meet in a fine edge. The angle between the faces, measured from the centre line of the blade, shapes how the knife behaves. A smaller angle gives a thinner, keener edge that slices well but is more delicate. A larger angle is sturdier and better for hard use. Many kitchen knives from European traditions use a wider angle than thin-bladed Japanese designs, so the right setting depends on the knife. Check the maker’s guidance for your blade if you can.
As you grind one side, a thin curl of metal called a burr forms on the opposite face. Feeling for it with a fingertip, moving across the edge and not along it, tells you when you have worked the edge fully. You remove the burr with lighter strokes on the other side or a finer abrasive. Skipping this step leaves a ragged edge that dulls quickly.
Grit describes how coarse an abrasive is. Coarse grits remove metal quickly and are used to repair damage or reshape; medium grits sharpen a dull edge; fine grits refine and polish. A typical sequence moves from coarse to fine, and each step removes the scratches of the previous one. Many manual tools combine stages, such as a coarse slot followed by a fine one. Match the starting grit to the condition of the edge, and do not use coarse stages when a light touch-up will do.
Pull-Through Tools Versus Guided and Stone Systems
Manual sharpeners fall into broad categories, and each suits a different person. Pull-through tools have slots with abrasive surfaces set at a fixed angle. You draw the blade through, and the tool does the angle control. They are fast, easy and compact, which makes them popular for quick touch-ups. The downside is limited control. The angle is fixed, the abrasive can be aggressive and some designs remove more metal than necessary. They may not suit very thin, hard or specialised blades.
Guided systems clamp or hold the blade and keep a set angle as you move a stone or plate along it. They give repeatable results and are friendly for learners who want better edges than pull-through tools provide. They take more time to set up and learn. Rod systems, with abrasive rods set at fixed angles, maintain an edge well and are good for upkeep, though they are less suited for repair work.
Freehand stones give the most control and the widest range of results, but they demand practice to hold a steady angle. Rolling sharpeners offer an easy way to keep an angle with a magnetic holder.
- Want speed and simplicity: a pull-through tool.
- Want repeatable accuracy: a guided system.
- Want upkeep between sessions: a rod system.
- Want mastery: stones, with practice.
Abrasive Types: Diamond, Ceramic and Carbide
The abrasive affects how fast the tool cuts, what finish it leaves and how long it lasts. Diamond abrasives are very hard and cut quickly, working on a wide range of steels, including hard ones. They are available in various grits and tend to last if used with a light touch. Ceramic abrasives are fine and polishing, ideal for finishing an edge or maintaining one, and they wear slowly. Their finer cut makes them slower for repairing dull blades. Tungsten carbide abrasives are aggressive and remove metal fast; they are common in pull-through tools designed for quick results. That speed means they can wear a blade away if overused.
Natural and synthetic stones are another family, with varied cutting behaviours. Some stones are used with water or oil, and each type has its own care routine. Guided systems often accept interchangeable stones or plates, allowing a progression from coarse to fine.
Think about your knives and habits:
- Hard steels respond well to diamond, while soft steels are easier to sharpen with many abrasives.
- Delicate or thin blades are better served by finer abrasives and a lighter touch.
- Occasional users may prefer a simple fixed tool, while enthusiasts value a progression of grits.
Check how replacement abrasives are supplied. A tool whose plates or wheels cannot be replaced has a limited life, while one with replaceable parts can last longer.
Matching the Tool to Your Knives
Not every sharpener suits every knife. Start by listing the knives you own and what they are made of. Kitchen knives vary: thick-bladed European styles, thin Japanese styles, serrated bread knives, and paring knives all behave differently. Serrated edges need rods or tools made for them, and fixed-angle pull-through tools generally do not suit them. Pocket knives and hunting knives are usually thicker and more tolerant of coarse abrasives. Specialist blades, such as scissors, scythes or chisels, often require different tools or accessories.
Check the listing for supported blade types, maximum blade thickness and length, and angles offered. Some tools have a fixed angle that may not match your knives. A wrong angle can reshape the edge unexpectedly, requiring more metal removal than necessary. If your knives vary, a guided system with adjustable angle may be the best fit.
Also consider the condition of your knives. A chipped or very dull blade may need coarser stages and more time. A knife that is slightly dull will benefit from a fine rod or ceramic stage. For expensive or valued knives, choose a gentle method, and think twice before using aggressive carbide tools. Ask whether the maker states that the tool is safe for your knife brand or material, and check warranty terms of your knives if they mention sharpening methods.
Technique, Safety and Testing the Result
Good technique makes any sharpener work better. Secure the tool on a stable, non-slip surface, or hold it firmly. Use light, steady pressure, because pushing hard does not speed up good sharpening and can damage the edge or the tool. Keep a consistent angle and use the full length of the edge, from heel to tip. Count strokes on each side so the work is even. Check the edge frequently instead of grinding on blindly.
Safety needs attention. Keep fingers behind guards and away from the edge. Do not rush, and be careful when wet or oily surfaces make the tool slip. Wipe the blade after sharpening, since metal particles and slurry stick to the steel, then rinse and dry it. Clean the sharpener as the manual directs, because clogged abrasives cut poorly.
Test the result. A common check is slicing a sheet of paper or a ripe tomato, noting whether the knife cuts without pressure. Avoid testing by dragging your thumb along the edge. If the edge still tears, repeat the finer stage, check for a remaining burr or return to a coarser stage if the edge is damaged.
Signs the sharpener needs replacement include abrasives that are smooth or glazed, plates that are cracked, guides that wobble and a tool that no longer produces an edge in reasonable time. Keep a note of the angle and stages you use to make future sessions consistent.
Manual Knife Sharpener FAQ
Are manual sharpeners better than electric ones?
They remove less metal and give more control, but they take longer.
What is the easiest manual sharpener?
Pull-through tools are the quickest to learn.
Can one tool fit all knives?
Not always. Check angle and blade shape.
How often should I sharpen?
As often as the edge needs it. A few times a year is common for home cooks.
What is a burr and why does it matter?
A burr is a thin curl of metal raised on the opposite side while you sharpen. Removing it with lighter strokes or a finer abrasive leaves a cleaner, longer-lasting edge.
Can I sharpen serrated knives with a pull-through tool?
Usually not, unless the tool states it supports serrated edges. Rods or tools made for serrations are a better fit.
Which angle should I use?
Follow the knife maker's guidance when available. Thinner, harder blades often use smaller angles, and sturdier knives use larger ones.
How do I know when the knife is sharp?
Test it on paper or soft produce and see whether it cuts with little pressure. Do not test with your thumb.
Will a sharpener wear out?
Yes, abrasives glaze and wear down. Look for replaceable parts and follow cleaning advice to extend the life.
Is a rod or a stone better for upkeep?
Rods are quick for maintenance between sessions, while stones offer more control and range. Many people use both.
Can I damage a good knife with a sharpener?
Aggressive tools can remove more metal than necessary and change the edge. For valued knives, use gentler methods and check the sharpener's recommended blade types.
Honing Versus Sharpening: Two Jobs People Mix Up
Much of the frustration with manual sharpeners comes from asking one tool to do a job it was not designed for. Honing and sharpening are different, and knowing which one your knife needs decides whether a session helps or wastes time.
Honing realigns an edge. With use, the very fine edge of a blade bends slightly to one side, which makes a knife feel dull even though little metal has been lost. A few light passes on a smooth rod or fine ceramic surface straighten it again. It removes almost no steel and takes under a minute.
Sharpening removes metal to form a new edge. When the edge has been rounded off by use, honing cannot bring it back, because there is no fine apex left to straighten. You need an abrasive that cuts, such as a diamond plate, a coarse stone or the carbide blades in a pull-through tool like the AccuSharp.
A simple test helps you decide. If the knife cut well a week ago and feels slightly off, hone it. If it crushes a tomato skin or slides off an onion even with a good rod, sharpen it. Rod sets such as the Spyderco Tri-Angle Sharpmaker straddle both jobs, because the ceramic rods are fine enough to refresh an edge and, with firmer pressure, can restore a mildly dull one.
A Realistic Maintenance Schedule
There is no single interval that suits everyone, since it depends on how often you cook, what you cut and the steel in your knife. A knife used daily on a plastic or wood board will need attention more often than one used twice a week. Cutting on glass, stone or ceramic plates dulls any edge quickly, so avoid those surfaces.
A sensible routine looks like this:
- Every few uses: a light honing or a pass or two on a fine setting, whichever your tool offers.
- When performance drops: a short sharpening session. Do it before the knife is truly dull, because refreshing a slightly worn edge takes far fewer strokes than rebuilding a ruined one.
- Once or twice a year: a more careful session with a coarse and a fine stage, if your sharpener has both, to reset the edge geometry.
Home cooks who use a pull-through tool tend to over-sharpen, because each pass removes metal. Using the tool only when the edge needs it extends the life of the knife and the sharpener. Guided systems such as the Work Sharp and the Edge Pro Apex cut precisely, so a few minutes now and then is plenty.
Keep notes if you like routine. Writing the date on a piece of tape inside a cabinet tells you how long a knife held up and helps you adjust the schedule to your kitchen.
Serrated Edges, Scissors and Garden Tools
Not every blade in the house is a straight kitchen knife, and a sharpener that handles one kind well may not suit another.
Serrated knives have scalloped teeth that cut with points, so they stay sharp longer than a straight edge but need a different approach. A flat pull-through slot will grind the tips off. Serrated edges are sharpened one scallop at a time with a tapered rod or a rod corner, and the maker of your tool should say whether it supports this. Where it does not, many people choose to replace a serrated bread knife instead of repairing it.
Scissors are cut at an angle and rely on a precise gap between the blades. A guided tool or a stone can sharpen the beveled side, but never the flat inner face. Some hand-held tools, such as the AccuSharp, are described as knife and tool sharpeners, so check which items the listing names before using it on shears.
Garden tools and axes need a coarser abrasive and a heavier bevel. A fine ceramic rod is far too slow. Guided systems with a coarse plate or a hand stone are a better fit.
When in doubt, test on an old or inexpensive blade first. A scratch on a kitchen utensil you do not care about is cheap, and a mistake on a good knife is not.
Budget Versus Premium: Where the Money Goes
The cost difference in this group reflects control and effort, not just materials. A basic pull-through sharpener has fixed angles, a short learning curve and cheap abrasives. The trade-off is that it removes more metal than needed and cannot adapt to knives with different angles, so it suits a kitchen with a few ordinary knives.
Spending more buys:
- Adjustable angles, which let you match a Japanese blade at a shallow angle and a work knife at a steeper one.
- Replaceable abrasives, so a worn plate is a cheap part rather than a reason to buy a new tool.
- Finer finishes, which cut cleanly through tomatoes, fish and herbs.
- Stable construction, such as a clamp or a table base, so you can focus on the stroke.
The price of that control is time. A guided stone system rewards patience and is slower than pulling a blade through a slot. If you hate sharpening, a faster tool you actually use will serve you better than a precise one that sits in a drawer.
A fair way to decide is to count your knives and ask how much you value each one. A set of inexpensive knives does not need a precision system. A single expensive Japanese knife deserves better than a harsh slot that could chip it.
Frequently Asked Questions
Should I sharpen a brand new knife?
Often not at once. Many knives arrive sharp enough for kitchen work, so use it first and hone it lightly. Sharpen when it starts to drag or tear. If a new knife is clearly dull or has a rough factory edge, check the angle the maker recommends before you begin.
Can I sharpen a ceramic knife with a manual sharpener?
Most steel abrasives will not cut ceramic, and the wrong tool can chip it. Ceramic needs diamond abrasives, and some makers advise sending the knife back for service. Check the sharpener listing for ceramic compatibility before you try.
Why does my knife dull so quickly after I sharpen it?
Common causes are a leftover burr that folds off on first use, a hard board that wears the edge, or soft steel that does not hold an edge. Finish with a few light, alternating strokes on a fine surface to remove the burr, and review your board.
Do I need to oil or wet a sharpening stone?
It depends on the stone. Some stones need water or oil to carry away metal, and others are used dry. Using the wrong liquid can clog the surface for good. Follow the instructions that came with your stone, and do not mix oil and water on the same one.
The Short Version
For guided control, the Work Sharp Guided System. For counter use, the Brod and Taylor. For speed, the AccuSharp. For enthusiasts, the Edge Pro Apex. For rolling, the Tumbler. For upkeep, the Spyderco Sharpmaker. Choose by how much control you want, then confirm fit on the listing.