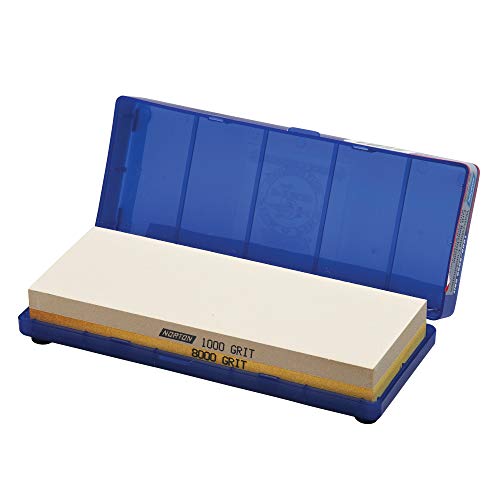
A sharpening system is more than a pull-through slot. It is a set of stones, guides, rods or belts that hold your knife at a steady angle, so you control the finished edge. Systems suit cooks who enjoy the process, and they take more effort than a simple sharpener, but they reward you with sharper, longer-lasting edges.
The six systems below include guided stone kits, a rod-based system, powered units and a roller design. We have not used these products ourselves, so confirm what each kit includes, the angles it supports and the knife types it suits on the current listing before buying.
As an Amazon Associate we earn from qualifying purchases. Links below are affiliate links, and they do not change the product information we give.
What to Look For
| Feature | Why it matters |
|---|---|
| Guidance | Angle guides or clamps help beginners hold a steady edge on every pass |
| Abrasives | Several grits let you repair, sharpen and polish an edge |
| Power source | Hand-powered systems are quiet and gentle; powered units are faster |
| Setup space | Some systems need a bench, water or a clamp, so check where you will use it |
| Knife range | Confirm the system handles kitchen blades as well as pocket knives and tools |
In this guide
Specs at a Glance
| System | Type | Powered | Notes |
|---|---|---|---|
| Lansky Deluxe 5-Stone | Clamp and stones | No | Guided angle rods |
| Work Sharp Guided Sharpening System | Guided stones | No | Angle-guided design |
| Spyderco Tri-Angle Sharpmaker | Rod system | No | Ceramic rods at set angles |
| Tormek T-4 | Water-cooled wheel | Yes | Slow wheel and cooling water |
| Work Sharp Ken Onion Edition | Belt sharpener | Yes | Adjustable angle control |
| HORL 2 Rolling Knife Sharpener | Roller guide | No | Magnetic angle holder |
The 6 Best Kitchen Knife Sharpening Systems
Top pickBest for learning controlled hand sharpening
1. Lansky Deluxe 5-Stone Sharpening System
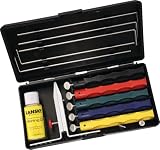
A classic clamp-and-rod kit that holds the blade while you slide stones along guided angles. It is a traditional way to learn precise sharpening and has been around for years.
Suits: learning controlled hand sharpening. Strengths: guided angles and a known brand. Weaknesses: setup takes time for each knife. Skip it if you want a quick, one-pass sharpener.
Best for hand sharpening with guidance
2. Work Sharp Guided Sharpening System
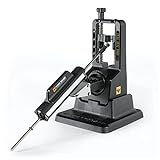
A hand-powered system with an angle-guided design, intended to help users repeat the same edge every time. Work Sharp positions it for knives and some other tools.
Suits: hand sharpening with guidance. Strengths: angle consistency and a clear process. Weaknesses: slower than powered machines. Skip it if you want a motorized option.
Best for maintaining already sharp edges
3. Spyderco Tri-Angle Sharpmaker
A rod-based system where ceramic sticks sit at preset angles and you draw the knife straight down. It is popular for touch-ups on both kitchen and pocket knives.
Suits: maintaining already sharp edges. Strengths: easy set angles and a compact kit. Weaknesses: not meant for heavy repair. Skip it if you need to rebuild a damaged edge.
View Spyderco Tri-Angle Sharpmaker on Amazon
Best for a serious sharpening hobby
4. Tormek T-4 Water-Cooled Sharpener
A slow-turning stone wheel that runs in water, so the blade stays cool while it is sharpened. Tormek is known for precise, premium sharpening machines.
Suits: a serious sharpening hobby. Strengths: cool, controlled sharpening. Weaknesses: it is bulky and needs setup. Skip it if you only own a few knives.

Best for fast powered sharpening
5. Work Sharp Ken Onion Edition Knife and Tool Sharpener
A belt-driven powered sharpener with adjustable angle control. Because the belts remove metal quickly, it can reshape worn knives and also handle garden tools.
Suits: fast powered sharpening. Strengths: speed and adjustable angles. Weaknesses: belts remove metal quickly. Skip it if you own delicate knives.

View Work Sharp Ken Onion Edition Knife and Tool Sharpener on Amazon
Best for a design-conscious cook
6. HORL 2 Rolling Knife Sharpener
A roller-style sharpener where the knife rests on a magnetic holder and you roll it across a wheel. The design aims to make angle control easy and the tool tidy.
Suits: a design-conscious cook. Strengths: easy angle control and a neat look. Weaknesses: a narrower range than full kits. Skip it if you want a full set of stones.

Care and Setup
- Read the maker’s instructions before your first pass.
- Use steady, light pressure and let the abrasive do the work.
- Keep stones and rods clean so metal dust does not clog them.
- Store the kit in its case to protect the abrasives.
- Check the edge on paper before returning the knife to use.
- Practice on an older knife before you work on your best one, so mistakes cost nothing.
Mistakes to Avoid
- Changing the angle partway through a pass.
- Skipping coarse grits on a dull blade.
- Using a powered system without practicing on an old knife first.
- Letting a blade overheat on a dry wheel.
- Pushing hard rather than steady.
Guided Versus Powered Systems
Sharpening systems fall into two broad groups. Guided manual systems hold the knife or the stone at a fixed angle while you move abrasive across the edge, so you do not need freehand skill. Powered systems use a motor to drive belts, wheels or stones, and they remove metal quickly. Each has a place, and the right choice depends on how many knives you own and how much time you want to spend.
Manual guided systems are generally slower but gentle, and they give a lot of control over angle and finish. They suit people who enjoy the process and want a refined edge. Powered systems are fast and consistent, which suits a household with many knives or someone who dislikes manual work. They tend to remove more material per pass, so use them carefully on thin or valuable blades.
Also consider the setup. Guided systems often come with a clamp, rods and a set of stones, and they need a stable surface. Powered systems need counter space, an outlet and sometimes water or belts. Decide where the system will live and whether you will bother to take it out. A convenient system will be used more often than a better one that sits in a cupboard.
Angle Consistency and Edge Geometry
The edge angle controls how sharp and how durable the edge is. Thinner angles slice cleanly but are less tolerant of hard use, and wider angles are tougher but cut with more resistance. Different knife traditions use different angles, so check what your knives are designed for. A system that offers adjustable angles is more flexible if you own both Western and Japanese style knives.
Consistency is where systems shine. When the angle is held by a guide, every stroke removes metal along the same plane, so the edge becomes crisp and even. A system that lets the angle drift will leave a rounded edge that feels dull despite a lot of work. Look at how the guide is secured and whether the clamp holds the knife without slipping.
If you change an angle significantly, expect extra work because you must remove metal to create the new bevel. Using a marker on the edge and checking where it rubs off is a handy way to see whether the stone is touching the bevel correctly. When in doubt, follow the maker’s recommended angle for your knives.
Abrasive Types, Grits and Progression
Most systems include several abrasives so you can progress from coarse to fine. A coarse abrasive reshapes damaged or very dull edges, a medium one forms a clean bevel and a fine one polishes it. Skipping steps leaves scratches from the previous stage, so move through the grits in order. If you only need to refresh an edge, you can start with a medium or fine abrasive.
Abrasive materials include diamond, ceramic, silicon carbide and natural or synthetic stones. Diamond cuts fast and lasts but can feel aggressive on soft steel. Ceramic is fine and slow, good for finishing. Check whether stones need water or oil, and whether replacements are available. Wear is normal, and a system that allows you to replace stones extends its life.
Finishing with a strop or a leather-backed compound can polish and align the edge, giving a smoother cut. For kitchen use, an extremely polished edge is nice, but a slightly toothier edge can cut tomatoes and tough skins more easily. Pick the finish that suits your cooking, and remember that fine abrasives are no substitute for the right angle.
Matching the System to Your Knives
Check the types of blades you plan to sharpen. Kitchen knives are usually long and thin, so the system must support the length of a chef’s knife and a narrow petty knife. Very hard Japanese steels are brittle at the edge, so be gentle and avoid aggressive abrasives. Softer Western steels tolerate heavier sharpening. Serrated knives need a tapered rod, so a flat-stone system will not work for them.
Some systems also handle pocket knives, scissors and tools, which adds value if you want a single system for the household. Confirm that the clamp accepts the blade thickness and that the guide can reach the full length of the edge. Blades with a bolster may restrict where the stone can reach, and you may need to work around it.
Consider your knife collection’s condition. A neglected knife with chips needs a coarse stage, and a well-kept one needs a quick refresh. If you rarely sharpen, you might choose a system that is easy to set up and put away. If you sharpen frequently, invest in one with a sturdy base and replaceable parts. Always read the listing for compatible knife types and ask the seller if anything is unclear.
Setup, Safety and Ongoing Care
Place the system on a stable, non-slip surface, and read the instructions before the first use. Keep your fingers away from the edge, and move the stone or knife away from your body whenever possible. Wear cut-resistant gloves if you are unsure, and keep the area free of clutter. Powered systems need extra care with loose clothing, hair and water near electricity.
Keep abrasives clean. Rinse stones as the maker advises, brush off metal dust and let them dry. Replace belts, stones or rods that are worn or clogged. Store the parts together in the case if one is provided, and keep the guide screws tight so the angle stays accurate.
Signs that the system needs attention include inconsistent edges despite correct technique, a clamp that no longer grips, worn abrasives that polish rather than cut, wobbling guide rods or a motor that sounds strained. Check the maker for replacement parts before buying a new system. After sharpening, wash and dry the knife and test it on paper or a tomato, then hone lightly to remove any burr.
Sharpening System FAQ
Is a system better than a pull-through sharpener?
Systems give more control, but they take more time and practice.
Which system suits beginners?
Guided kits with angle clamps are common starting points.
Do these work on pocket knives?
Many do, but check the listing for supported blade types.
Do I need water?
Only for water-cooled units like the Tormek.
How long does it take to sharpen a knife with a guided system?
It varies with the knife's condition and the system, but a routine touch-up takes less time than a full reprofile. Expect your first attempts to be slower while you learn the setup.
Do guided systems damage knives?
Used correctly, they remove only the metal needed to form the edge. Problems come from the wrong angle, too much pressure or an abrasive too coarse for the job.
Can one system sharpen both Japanese and Western knives?
Many can if the angle is adjustable and the abrasives are suitable. Check the listing for the angle range and go gently on hard, thin edges.
What should I do after sharpening?
Wash and dry the blade, check for a burr and finish with a light hone or strop. Then test it on paper or a soft vegetable.
How do I know when to sharpen instead of hone?
Honing straightens a slightly rolled edge, and sharpening removes metal to make a new edge. If honing no longer brings back cutting performance, it is time to sharpen.
Are powered systems loud or messy?
They can be louder than manual ones, and some produce metal dust or splash if wet. Check the listing and keep the work area clean.
The Short Version
For a classic guided kit, the Lansky. For hand guidance, the Work Sharp Guided. For touch-ups, the Spyderco Sharpmaker. For serious hobbyists, the Tormek T-4. For powered speed, the Work Sharp Ken Onion Edition. For a tidy design, the HORL 2.
Related Guides
- 6 Best Electric Knife Sharpening Systems (2026)
- 6 Best Pen Knife Sharpeners: Pocket, Guided and Rod (2026)
- 6 Best Rolling Knife Sharpeners: Angle-Guided Kits
- 6 Best Knife Sharpening Steels for Home Cooks
- 6 Best Diamond Knife Sharpening Stones for Any Edge (2026)
Burrs, Stropping and Finishing the Edge
Sharpening has two stages that people often blur together: removing metal to form a new edge, and refining that edge so it cuts cleanly. When you grind one side of an edge, a thin ridge of steel called a burr folds over to the other side. Finding and removing that burr is the difference between a knife that looks sharp and one that is sharp.
A simple way to check is to run a fingertip lightly across the edge, from the spine toward the cutting side, never along the blade. A burr feels slightly rough or catching. You can also watch for a faint line of reflected light along an edge that is not fully formed. Once a burr appears along the full length, switch sides and repeat until both sides have one, then move to a finer abrasive to reduce it.
Stropping is the last step for many people. A strop is a strip of leather or similar material, sometimes loaded with a fine compound, that polishes the edge and aligns the last microscopic burr remnants. It is not required, but it adds a noticeable finish if you are working with fine steel. Light pressure is the rule, because heavy pressure rounds the edge.
Reading the Steel: Soft, Hard and Everything Between
Steel hardness affects how a knife responds to sharpening. Softer steels, common in many Western kitchen knives, are forgiving and sharpen quickly but dull faster. Harder steels, common in many Japanese knives, hold an edge longer but need more patience to sharpen and may chip if the angle or technique is rough.
Hardness is usually measured on the Rockwell scale. The manufacturer may or may not publish it, and even when it does, it is only one part of the picture. Alloy, heat treatment and edge geometry all matter. If you do not know what your knife is made of, start with a gentle approach and a moderate abrasive, then adjust once you see how the steel responds.
Stainless blades tend to be easy to maintain, while carbon steel takes a very fine edge but can stain or rust if left wet. Very hard or specialty steels may need diamond or other hard abrasives to cut efficiently. Check that a system’s stones can handle the steel you own before you start.
How Often to Sharpen and What Wear Looks Like
Most home cooks do not need to sharpen often. A knife used a few times a week and honed regularly might need a full sharpening once or twice a year. Heavy daily use, cutting on hard boards or storing blades loose in a drawer all speed up dulling.
Signs that it is time include a knife that slips on tomato skin, crushes herbs instead of slicing, or needs extra pressure to cut onions. Another sign is a visible flat spot on the edge that reflects light, which indicates the apex has rolled or worn down.
Honing, by contrast, is a maintenance step that realigns a rolled edge without removing much metal. It can delay sharpening but cannot fix a truly dull blade. Learn which problem you have and use the matching tool.
Cutting Surfaces, Storage and Edge Life
The best sharpening system cannot protect an edge from bad habits. Cutting on glass, stone, ceramic or hard plastic dulls a knife fast. Wood and soft plastic boards are gentler. End-grain wooden boards are known for being kind to edges, though they need oiling and care.
Storage matters just as much. A knife rattling in a drawer collides with other metal and chips the edge. Use a magnetic strip, a block, in-drawer holders or edge guards. Wash by hand, dry promptly and avoid the dishwasher, where heat, detergent and collisions all take a toll.
Finally, use the right knife for the job. Prying, cutting frozen food or chopping bones with a thin kitchen knife can chip the edge, and repairing a chip means removing a lot of steel. Treat the knife as a slicing tool and keep a cleaver or older blade for rough work.
Budget, Space and Skill: Choosing Your Level of Involvement
Sharpening systems range from simple guided kits to powered machines and water-cooled wheels. Cost is one factor, but so are storage space and how much time you want to spend. A compact guided kit tucks into a drawer and suits an occasional sharpener. A larger wheel system takes counter or bench space and a longer learning period.
Consider how many knives you own and how often you will sharpen them. If you have a block of kitchen knives and a few specialty blades, a flexible system makes sense. If you only care about one or two knives, a simpler tool may be enough. Skill also matters: some systems are very forgiving, while others reward practice.
Finally, factor in consumables. Stones wear, belts need replacing, and some systems use specific abrasives or honing compounds. Look up the replacement cost and availability for each system before you decide, so you are not stuck with a tool that is expensive to keep running.
Frequently Asked Questions
What is a burr and why does it matter when sharpening?
A burr is a thin ridge of steel that folds to the opposite side of the edge as you grind. It confirms you have reached the apex on that side. If you do not remove it with finer grits or light stropping, the edge may feel sharp at first but dull quickly.
Can I sharpen serrated kitchen knives with these systems?
Most flat or guided systems are designed for straight edges. Serrated knives need a tapered rod or a tool that fits each scallop, and sharpening only the beveled side. Check whether a system lists serrated support before buying, and expect it to take extra care.
Is a diamond abrasive better than a ceramic stone?
Neither is universally better. Diamond cuts quickly and handles very hard steels, but can leave a coarser finish. Ceramic is fine-grained and gentle, suited to maintenance and refining. Many systems combine them, using diamond for shaping and ceramic for polishing.
How do I test knife sharpness at home?
A common check is to slice a sheet of printer paper held by one edge, or a ripe tomato. A sharp knife slices cleanly with little pressure. If it tears paper or slips on skin, the edge needs work. Avoid testing by running your finger along the edge.