Where to buy
Check the latest price, availability and delivery on Amazon. Orders are placed on Amazon. We may earn a commission from qualifying purchases. The beginner-honest headline: at $50 there is still no powered miter saw from any brand — and for a first saw that remains good news, because the two linked picks below are the benchmark hand miter kits, the most forgiving first saws a beginner can learn on, and the rest are honest prose-only alternatives including the powered graduation target.
- Best first miter saw under $50: CRAFTSMAN Mitre Saw, 12-Inch Saw & Clamping Box (CMHT20600) — Check on Amazon
- Best self-storing first kit: Stanley Saw Storage Miter Box with Saw (20-600) — Check on Amazon
- Japanese pull-saw miter box sets — the patient learner’s fine-finish route; prose-only below
- Excel Blades 6-Inch Metal Mitre Box Set (55666) — for beginners whose projects are models and crafts; prose-only below
- Olympia Tools Saw Storage Mitre Box with 14-Inch Backsaw — the basic alternative kit; prose-only below
- The graduation route: an entry powered compound miter saw — prose-only below, for when skills and projects outgrow hand cutting
Read the full guide ↓
Disclosure: As an Amazon Associate, umtsmarttool.com earns from qualifying purchases. Links to Amazon on this page are affiliate links; they cost you nothing extra. Listing details such as price and availability change often, so check the current Amazon listing before you buy.
Searching for the best miter saw for beginners under $50 usually starts with a picture of a powered saw — and the first service this guide owes you is the truth about the budget: no powered miter saw exists at $50, because the entry powered compound class costs well over twice this entire amount, and anything motorized advertised near it is a toy or a mislabel. The second service is the reframe: at the beginner stage, that is not a deprivation. The hand miter kit — a backsaw guided by a slotted, clamping box — is the best first saw ever designed for learning, because it cuts at your speed, stops when you stop, makes almost no dust or noise, and teaches the three habits every saw you will ever own rewards: measure honestly, clamp the work, let the tool cut. A beginner who starts powered learns to fear a machine; a beginner who starts by hand learns to cut.
What the $50 tier adds over $30 is real: both benchmark kits now verify inside the budget, so a beginner can choose between the cam-pin clamping CRAFTSMAN — the kit that holds your work while you learn the stroke — and the self-storing Stanley, whose saw lives in its box and whose tidiness suits first apartments and shared spaces. This guide reviews both as first tools, then spends its length where a beginner’s money is actually decided: the first-session walkthrough, the mistakes that produce gapping joints and how to read them, a first month of projects in the right order, and the honest graduation test for when a powered saw stops being a fantasy and becomes the correct purchase. If your first project is already a renovation, skip to the last pick now; this guide will not pretend otherwise. Everyone else, start here — and note that Best Miter Saw For Beginners Under $30 covers the same philosophy one tier down.
In this guide
Quick Picks
Each row matches a beginner type to the option that fits. The two linked picks are the complete kits verified as sold within this budget; the rest are described in prose, with reasons stated in each review.
| Beginner type | Pick | Why it stands out | Link |
|---|---|---|---|
| Best first miter saw | CRAFTSMAN Mitre Saw, 12-Inch Saw & Clamping Box (CMHT20600) | Cam pins clamp the work for you while you learn the stroke | Check on Amazon |
| Best for tidy starters | Stanley Saw Storage Miter Box with Saw (20-600) | Saw stores inside the box; one drawer, one kit, nothing lost | Check on Amazon |
| Best for patient learners | Japanese pull-saw miter box sets | Pull-stroke technique rewards gentleness with the finest finishes | Prose-only — check price on Amazon |
| Best for craft beginners | Excel Blades 6-Inch Metal Mitre Box Set (55666) | Metal hobby box and razor saw sized for models and small crafts | Prose-only — check price on Amazon |
| Best basic alternative | Olympia Tools Saw Storage Mitre Box with 14-Inch Backsaw | Simple complete kit for first projects on a price dip | Prose-only — check price on Amazon |
| Best graduation target | Entry powered compound miter saw (10-inch, 15-amp class) | The saw to save for when projects — not curiosity — demand it | Prose-only — well over twice this budget |
How These Picks Were Chosen
The first filter was budget honesty: a pick had to be a complete, ready-to-cut kit — box, saw and workholding — sold as a real Amazon listing positioned within $50 in the United States. Check the current price on Amazon before you buy, because these listings drift between sellers. That rule removed every powered saw and every bare box sold without a saw, the twin traps of the beginner market: the first cannot exist at the price, and the second quietly doubles it.
We did not use these tools ourselves. We read maker listings, specification pages and reputable roundups, then ranked through a beginner’s eyes. For a first saw, the decisive spec is whether the kit holds the workpiece still, because instructors watch the same failure in every new student: the stock creeps against the fence mid-cut and the angle leaves with it. Kits with positive clamping therefore lead. Second came forgiveness — a stiff-spined backsaw that tracks instead of wandering, slots at the angles beginners actually use (90° and 45°, with 22.5° face angles to grow into), and a box rigid enough to stay true through a year of learning. Third came ownership friction: storage as one object, nothing to assemble, nothing to adjust wrongly on day one.
Prose-only picks carry their reasons openly: the pull-saw sets and the Olympia kit are real categories whose individual listings we did not verify to link standard; the Excel set’s specifications are verified but its current in-budget US price is not; the powered saw is advice, not a purchase. No specification is invented anywhere in this guide. Beginners who want the setup-day companion should keep How To Use A Miter Saw Basics open for their first session; it walks the first cuts step by step.
The 6 Best Miter Saws for Beginners Under $50
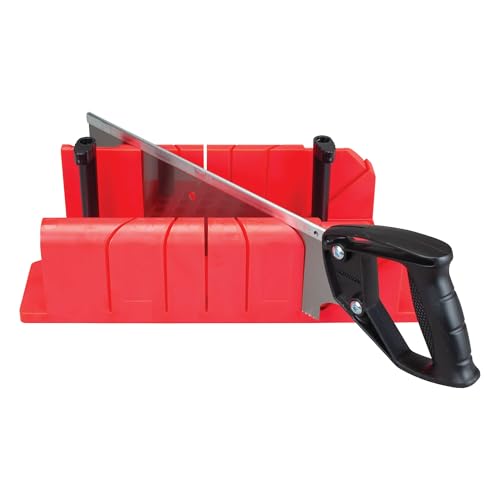
CRAFTSMAN Mitre Saw, 12-Inch Saw & Clamping Box (CMHT20600)
Who it suits: First-time saw owners whose projects are frames, trim, small shelves and repairs — and who want the kit to remove the hardest part of learning, which is holding everything still.
The kit is complete in the way a beginner needs: miter box, 12-inch backsaw and two cam pins in one box. The pins earn this kit the top of a beginners’ guide at any tier: place the workpiece, twist the cam-shaped pins, and they lock the stock against the box’s honeycomb base — the tool does the holding while you learn the stroke, so the two skills a beginner is worst at do not have to happen simultaneously. The box cuts 90° and 45° and adds face angles of 45° and 22.5°, which you will ignore in week one and use by month three. The backsaw’s stiff spine keeps the thin blade from bowing, which is what lets a beginner’s cut land flat enough to glue — and early glue-able joints are the encouragement that carries a beginner through the clumsy phase.
Your first session should be deliberately small: clamp the box to a table, cut scrap at 90°, check it against a square, then cut two 45s and hold the pair together. Ten minutes of that teaches more than any video, because your hands learn what your eyes cannot tell them — how little downward pressure the saw wants, how the kerf should open exactly on the line. At $50, the budget also funds the beginner’s real toolkit around the kit: a combination square, practice stock, a spare blade for the inevitable dull day. The kit’s honest boundary is capacity and speed — small stock, hand pace — and the graduation pick covers the day that boundary binds. Check the current price on Amazon before ordering; it is verified inside this budget and arrives as one complete box, which is how a first tool should arrive.
- Complete first kit: box, 12-inch backsaw, two clamping cam pins.
- Cam pins lock the work — the beginner accuracy problem, solved by the tool.
- 90°/45° plus 45° and 22.5° face angles to grow into.
- Budget room at $50 for the square, spare blade and practice stock.
Honest limitation: Hand pace and small capacity by design. It teaches beautifully; it will not frame, floor or demolish.
Choose it if you are starting with frames, trim and small projects and want the most forgiving complete kit. Skip it if your first project is a renovation — read the graduation pick and budget honestly.
Stanley Saw Storage Miter Box with Saw (20-600)
Who it suits: Beginners in apartments and small homes, where a first tool survives only if it stores as one tidy piece — and who at $50 can now buy the design outright instead of stretching for it.
At the $30 tier this kit was the step-up we could only describe; at $50 it is a full, linked recommendation, and for many beginners it is the right one. The design’s virtue is ownership simplicity: the 14-inch backsaw stores inside the high-impact box, so your entire mitering capability is one flat object in one drawer — nothing to lose, nothing to assemble, nothing to store wrongly. The box offers 90°, 45° and 22.5° slots with a clamping facility for the work, and the longer saw gives a stroke many beginners find easier to keep smooth than the 12-inch class. The pattern has been in production for decades, which for a first tool is a feature: every tip, video and troubleshooting note ever published about miter boxes was quite possibly written about this one.
Choosing between the two linked kits is the beginner’s first real tool judgment, and it is genuinely close. The CRAFTSMAN’s cam pins are the stronger dedicated workholding — the edge that matters most while your hands are learning. The Stanley’s self-storage is the stronger daily ownership, and its longer stroke forgives a choppy rhythm slightly better. A beginner with a bench and a toolbox leans CRAFTSMAN; a beginner with a drawer and a kitchen table leans Stanley, and neither is wrong. Check both live prices on the day — these listings drift — and let a wide gap settle what the virtues leave tied. Either way you start with a complete, honest kit, which is the only non-negotiable this guide insists on.
- Saw stores inside the box: one drawer, one kit, zero lost pieces.
- 90°, 45° and 22.5° slots with a clamping facility.
- 14-inch backsaw: a longer, smoother stroke for new hands.
- Decades in production — every beginner resource applies to it.
Honest limitation: Its workholding is a clamping facility rather than the CRAFTSMAN’s dedicated cam-pin system; class limits on pace and capacity apply.
Choose it if storage tidiness and ownership simplicity lead your priorities. Skip it if maximum workholding is the priority — the CRAFTSMAN, by a nose.
Japanese Pull-Saw Miter Box Sets
Who it suits: Beginners who enjoy learning technique for its own sake, whose first projects — frames, small boxes, fine trim — will show their joints.
A Japanese pull saw cuts as you draw it toward you, and the thin blade that makes possible leaves a narrow kerf and a face that often goes straight to glue. For a beginner, the style’s deeper virtue is pedagogical: a pull saw punishes forcing instantly and rewards a light, steady rhythm obviously, so it teaches the core hand-saw virtue — patience — faster than any backsaw. Sets pairing a box with a fine pull saw appear in roundups within this budget, typically in four-piece configurations with small extras, and at $50 the credible end of the style comes into reach. Your first frames will look startlingly fine for first frames.
The cautions are part of the curriculum. Fine pull-saw teeth are hard and brittle: twist in a cut or meet a hidden staple in reclaimed trim and teeth chip. The rhythm takes one practice board to settle. And the pick is prose-only because sets under this description vary by seller and no single listing’s contents and price met our link standard — read the exact listing carefully, because blade quality is where these sets separate. Pair this route with How To Make A Miter Joint for the layout and glue-up craft, and keep a backsaw kit in mind as the household’s second tool for rougher stock.
- Thin-kerf pull stroke: the finest beginner faces in this guide.
- Technique teaches itself — force fails, rhythm works, visibly.
- Box-and-saw sets in this budget suit frames and fine work.
Honest limitation: Brittle fine teeth and a real learning curve; seller-variable contents need checking.
Choose it if craft and finish are your beginner goals. Skip it if you want the most forgiving general first kit — that is the CRAFTSMAN.
Excel Blades 6-Inch Metal Mitre Box Set (55666)
Who it suits: Beginners whose first projects are small by design — models, miniatures, dollhouse builds, balsa craft — and who need precision at desk scale from day one.
Not every beginner is cutting trim, and a carpentry kit is the wrong teacher for desk-scale work: too big, too coarse, its blade tearing the faces a miniature cannot hide. This set is the scaled answer — a six-inch aluminum-and-steel box, a K5 handle and a razor pull saw, cutting 45° and 90°. The metal box is the beginner feature: its guide slots do not flex or wear like tiny plastic boxes, so the angles you practice are the angles you get, from the first model to the fiftieth. The razor teeth leave balsa and basswood nearly finish-ready. It is made in the USA.
The boundary is absolute: this set will never cut trim or furniture parts, and buying it as a general first saw is the mistake this guide exists to prevent. It is prose-only because, while the product and specifications are verified from maker listing information, we did not verify a current in-budget US Amazon price to link standard — check the live listing. Craft beginners should buy it with confidence in the tool; carpentry beginners should buy the CRAFTSMAN and let this be a later, second-scale purchase if miniature work ever calls.
- Metal six-inch box: true angles for desk-scale learning.
- Razor pull saw leaves craft stock nearly finish-ready.
- 45° and 90° — the angles hobby beginners actually use.
Honest limitation: Hobby capacity only, permanently. A specialist, not a starter for carpentry.
Choose it if your beginner projects are models and miniatures. Skip it if your projects come from a lumber counter.
Olympia Tools Saw Storage Mitre Box with 14-Inch Backsaw
Who it suits: Beginners who want the simplest complete kit and are shopping the value brands by live price.
Olympia’s kit is the classic storage pattern — molded box, 90°/45°/22.5° slots, 14-inch backsaw stored inside — with nothing to adjust and nothing to assemble, which for a beginner is a real virtue: the first session can be about cutting, not about setup. Its known ask is workholding: this class of basic box typically leans on the user’s free hand against the fence rather than a positive clamp, and a beginner’s free hand is the least trained component in the system. Expect the first joints to need the practice board, and adopt the universal workaround early — box clamped to the table, stock held low and firm, stroke light — which this guide’s walkthrough section teaches regardless of brand.
Prose-only on verification grounds: a fixture of Amazon miter-box roundups, but no current US price and listing verified to link standard. The beginner’s buying rule is therefore comparative: check its live price against both linked kits on the same day. A meaningful gap in Olympia’s favor can rationally fund a beginner’s square and practice stock — purchases that improve joints more than the brand gap harms them. At anything near parity, buy a linked kit and learn on the stronger workholding.
- Complete self-storing kit; nothing to adjust or assemble.
- Standard beginner angles: 90°, 45°, 22.5°.
- Simplest possible first-session experience.
Honest limitation: Hand-held workholding makes early accuracy harder-earned than the clamping kits.
Choose it if its live price clearly undercuts both linked kits. Skip it if prices are close — clamping is the beginner feature worth paying for.
The Graduation Route: An Entry Powered Compound Miter Saw
Who it suits: Beginners whose ambitions are already renovations — and every beginner eventually, when projects grow up.
The powered destination is a defined class: a 10-inch blade on a 15-amp motor at up to about 5,000 RPM, a single-bevel compound head, roughly 24 pounds to carry, with the Metabo HPT 10-inch compound saw as its usual value benchmark. It costs well over twice this guide’s budget — no link, no price, no pretending — and buys capacity, bevels and pace. For a beginner, the graduation test is self-knowledge, administered honestly: graduate when your projects regularly exceed small stock; when you need bevels or compound angles; when one project needs more cuts than a pleasant afternoon holds; or when your hand results are consistently good and the tool — not your technique — has become the limit. That last condition is the one beginners skip, and it matters most: upgrading while layout and clamping habits are still forming simply brings your errors to a faster, less forgiving tool.
The hand kit’s graduation gift is that it is never wasted money: it stays on the shelf for one-off small cuts forever, and its lessons transfer intact. When the day comes, How To Choose A Miter Saw walks blade sizes, bevel types and capacities at purchase depth. Until then, the correct beginner posture toward the powered class is interest without urgency — you are not behind; you are in the classroom the powered saw’s best owners all passed through.
- 10-inch, 15-amp class: lumber, bevels and all-day pace.
- Correct when projects — not curiosity — demand it.
- Your hand kit and its lessons remain valuable afterward.
Honest limitation: Well over twice this budget, plus storage, power and hearing protection.
Choose it if your first projects are already renovations. Skip it if you are still forming layout and clamping habits — graduate technique first.
Comparison Table
| Product | Type | Key verified spec | Best use | Link |
|---|---|---|---|---|
| CRAFTSMAN Mitre Saw & Clamping Box (CMHT20600) | Hand miter kit | 12-in backsaw, cam pins, honeycomb base; 90°/45°, face 45°/22.5° | The forgiving first kit for trim and frames | Check on Amazon |
| Stanley Saw Storage Miter Box (20-600) | Hand miter kit | 14-in backsaw stores in box; 90°/45°/22.5° slots | Tidy first-tool ownership in small homes | Check on Amazon |
| Japanese pull-saw miter sets | Hand miter kit | Thin-kerf pull saw with miter box | Finest finishes for patient learners | Prose-only |
| Excel Blades Mitre Box Set (55666) | Hobby miter set | 6-in aluminum/steel box, razor pull saw, 45°/90° | Models, miniatures and crafts | Prose-only |
| Olympia Tools Mitre Box with Backsaw | Hand miter kit | 14-in backsaw, storage box, 90°/45°/22.5° slots | First projects on a price dip | Prose-only |
| Entry powered compound miter saw | Powered saw | 10-in blade, 15-amp class, up to ~5,000 RPM | Graduation: lumber, bevels, volume | Prose-only — above budget |
How to Choose Your First Miter Saw at $50
- Buy complete, always. Box, saw and workholding in one purchase. A bare box is the classic beginner false economy at any tier.
- Let workholding lead. Your first cuts will fail from moving stock, not weak sawing. Cam pins or a real clamping facility are worth more than blade length, brand or bonus angles.
- Choose between the linked kits by home, not by hype. Bench and toolbox: CRAFTSMAN. Drawer and kitchen table: Stanley. Both are complete, verified and in budget at $50.
- Match the kit’s scale to your first projects. Trim and frames: the carpentry kits. Models and miniatures: the metal hobby set. Crossing that line in either direction wastes the whole budget.
- Spend the tier’s headroom on learning. At $50 the kit leaves room for a combination square, practice stock and a spare blade. Those three teach more than any further tool upgrade available at this level.
- Treat adjustability and exotic angles as later purchases. 90° and 45° carry your first year. The 22.5° slots in both linked kits are your growth path; anything more specialized can wait for the project that demands it.
- Be honest about project scale. If your first project is flooring or framing, this tier is wrong entirely — bank the $50 toward the tool the project needs and rent for the weekend itself.
- Ignore powered listings near this price. Beginners are the least able to absorb the toy-saw lesson expensively, and the listings are aimed at exactly you.
Your First Session at $50: The Walkthrough, Revisited
Unbox onto a clear table and lay the whole kit out — box, saw, pins, and the square you wisely bought in the same order. Clamp the box itself to the table’s edge; a sliding box is the hidden author of half of all “inaccurate tool” verdicts, and a beginner deserves to meet the tool with that variable already removed. Put a piece of scrap trim in the box, against the fence, and set the cam pins or hold the stock low and firm, hand well behind the cut line. Mark your line with the square across the top face and down the near side — two faces of line, so the saw’s truth is visible from two directions. Rest the backsaw in the 90° slots, teeth on the waste side of the line, and take three slow pull strokes with almost no downward pressure. You are scoring a track, not cutting; if it starts off-line, those gentle strokes are free to restart, which is precisely why they exist.
Then settle into long, even strokes using most of the blade, letting the saw’s weight work. The beginner’s instinct — press down, saw fast — bows the blade and wanders the cut; slow is not the cautious option here, it is the technique. Ease off as the blade nears the bottom and support the offcut so it cannot snap free and tear the face. Check the piece against the square. Now cut the second half of the same corner without changing the setup, and hold the pair together. That first closed miter — two beginner cuts meeting without a gap — usually arrives within the half hour, and it recalibrates everything a new saw owner believes about their own aptitude. The tool was never the question; the setup was, and you have just learned to control it. Everything in your first month is refinement of this session: finer stock, longer pieces, the 22.5° slots, and eventually the powered question, asked from a position of earned knowledge.
Reading Your Joints: A Beginner’s Diagnostic Guide
Every imperfect joint is a report, and beginners who learn to read reports improve ten times faster than beginners who simply resolve to “be more careful.” A gap at the front of a closed corner, with the back tight, means the two angles summed slightly over ninety — usually one piece crept against the fence as its cut finished. That is a clamping report: pins set firmer, box brushed clean so stock seats fully, holding hand lower and closer. A gap at the back is the mirror — angles under ninety, often stock rocking on a sawdust pile trapped at the fence. That is a cleanliness report, and its fix — brush the box between cuts — is so small it feels like cheating. A wavy, washboard cut face is a stroke report: pressure varied, the blade recorded every change, and the cure is rhythm — longer strokes, lighter hands, slower pace.
Length errors masquerade as angle errors, and separating them saves beginners weeks. If two sides of a frame close beautifully and the fourth corner gapes, your angles are fine and your lengths are not: a frame is two pairs of identical lengths before it is four corners. Cut one side, then mark its opposite from the piece itself rather than from the tape, so any error is at least a matching error. And if joints close in practice pine but gap in project hardwood, that is a material report — dense stock magnifies every stroke flaw and dulls blades faster — answered by slowing down and, when cuts start demanding pressure, changing the blade. Keep a small notebook for the first month: project, stock, what the joint said, what you changed. It is the cheapest instruction in woodworking, and it is why a $50 hand kit, honestly used, produces saw judgment that a rushed powered purchase never does.
A Beginner’s First Month: Projects in the Right Order
Sequence matters more than ambition. Week one is the picture frame, built twice: the first from cheap pine as tuition — cut slowly, checked obsessively, expected to show a flaw — and the second from the same stock, where you watch the flaws shrink. Between the two, your stroke finds its rhythm and your clamping becomes automatic, at a materials cost of almost nothing. Week two adds length: a shelf or small bookcase with mitered edging, whose lesson is keeping longer stock seated against the fence for the whole cut — the moment clamping stops being a feature and becomes a philosophy. Week three adds an angle: an octagonal frame or small box using the 22.5° face slots, whose lesson is setup discipline — angled work punishes trusting the last setup instead of verifying the current one.
Week four is the first real commission, however small: casing one doorway, framing something that will hang where people see it, repairing a piece of furniture someone else owns. By then the kit’s limits will be obvious to you in the best way — felt, not read — and you will know exactly which future project would justify the powered graduation, because you will have met the boundary personally. That felt knowledge is the real product of a beginner tier at any price, and it cannot be shortcut: not by a bigger first purchase, which would only hide the boundary behind speed, and not by more reading, which describes the boundary without letting you touch it. A month, four projects, one honest notebook — that is the curriculum this $50 buys, and it graduates beginners who are genuinely ready for whatever saw comes next.
Beginner Safety at $50: The Short, Serious Version
A hand miter kit is the safest saw class there is, and it still has teeth. The realistic beginner injuries are small and specific: a saw skating at a cut’s start across a thumb parked too near the line; a hand drifting in front of the blade to steady a short offcut; a splinter from a nearly-cut piece snapped free. Each has a simple counter, and the $50 kits make all three easier to observe. Start every cut with light scoring strokes, which give the blade a track before force exists. Keep the holding hand behind the fence and use the kit’s clamping wherever the piece allows — clamping is a safety feature wearing an accuracy feature’s clothes. Never hold a piece so short that fingers enter the saw’s neighborhood; clamp it, or cut it from a longer piece and trim afterward. Support offcuts instead of letting them snap.
Build now the habits powered tools will later demand at higher stakes: eye protection for brittle plastics and old painted stock; a tidy bench, because small-tool accidents begin with clutter and reaching; and the discipline of stopping the moment a cut feels wrong — a luxury a hand saw grants completely and a powered saw does not grant at all. If a teenager is learning on the kit, the rules are identical plus supervision, and the saw stores in its box, edge covered, every single time. None of this makes the tool sound dangerous, because it is not; it makes your first year uneventful, so the stories are about the frames.
What $50 Buys a Beginner That $30 Does Not
Beginners comparing the two tiers deserve the precise ledger, because the difference is easy to misread as “a slightly better box.” At $30, exactly one complete clamping kit verifies inside the budget, and it is a good one — but the beginner’s purchase ends there, with nothing left for the instruments that turn a saw into a learning system. At $50, three things change. First, the Stanley storage kit joins the field as a fully linked equal, so the choice can be made on the beginner’s actual home and habits rather than on which kit happened to fit the smaller number. Second, the tier funds the supporting cast in the same order: the combination square that verifies your angles instead of letting you hope them, the spare blade that converts a dull Saturday into a two-minute swap, and enough practice stock to make your first joints tuition rather than casualties. Third — the quietest and largest change — the beginner stops shopping. A $50 first kit, completely accessorized, closes the miter question for the entire learning year, and the attention that would have gone to upgrade research goes to projects instead.
What the step up pointedly does not buy a beginner is capability: no motor, no bevel, no wider stock, no faster cut. If a beginner’s honest project list needs those, the tiers are equally wrong and the graduation pick is the only relevant section of either guide. But if the list is the normal beginner list — frames, trim, shelves, repairs, the occasional gift built by hand — then $50 buys the complete, accessorized, choose-your-philosophy version of the correct tool, and the remaining question is not what to buy next but what to build first. That is a good place for a beginner to stand, and it is exactly where this guide intends to leave you.
Common Buying Mistakes
- Buying a bare miter box and discovering the saw is a second purchase. Complete kits only, at every tier.
- Choosing the kit without real clamping to save a little, then blaming your hands for drifting cuts.
- Pressing down and sawing fast. Force bows the blade; the cut wanders; the joint gaps. Light and long is the whole secret.
- Skipping the practice frame and opening on the one good piece of casing you bought for the doorway.
- Never clamping the box itself, then reviewing the tool as inaccurate.
- Buying the hobby set for carpentry or the carpentry kit for miniatures — the scale error, now with a bigger budget.
- Spending all $50 on the kit and nothing on the square, spare blade and practice stock that make it teach.
- Upgrading to powered before your habits form — speed amplifies whatever technique it meets, including a beginner’s.
Final Recommendation
- Most beginners: CRAFTSMAN Mitre Saw, 12-Inch Saw & Clamping Box (CMHT20600).
- Small-space beginners: Stanley Saw Storage Miter Box with Saw (20-600).
- Craft and model beginners: Excel Blades 6-Inch Metal Mitre Box Set (55666).
- Finish-focused learners: a Japanese pull-saw miter box set.
- Renovation ambitions: bank the budget toward the powered compound class and rent for the first project.
Our top two for beginners at $50 are the two linked kits, chosen by home rather than by rank: the CRAFTSMAN clamping kit for the strongest workholding while your hands learn, and the Stanley storage kit for the beginner whose tools must live in a drawer. Between them they cover the realistic starts — a first bench corner and a first apartment — and both arrive complete, verified and inside the budget, which is more than the powered listings at this price can honestly say. Spend the tier’s headroom on the square, the spare blade and the practice pine; spend your first session on scrap; clamp everything that can be clamped; and check the live prices before you order. A beginner’s first saw should teach something true about cutting every time it comes out of the drawer — both of these do, and the lessons compound for as long as you own tools.
Frequently Asked Questions
Is a hand miter kit a real first saw, or a toy substitute for a powered one?
It is the original miter saw — the tool the powered version was invented to motorize — and for trim, frames and small parts it produces joints of the same quality, at hand pace. For a beginner it is arguably the better first saw outright: it moves at your speed, stops when you stop, and teaches clamping and layout habits that powered ownership will reward for decades. Start here, and every later saw is easier.
At $50, should a beginner choose the CRAFTSMAN or the Stanley?
By home and habit. The CRAFTSMAN’s cam pins give the strongest workholding, which is the beginner feature that matters most while technique forms. The Stanley stores as one self-contained piece and offers a longer saw stroke, which suits drawers, apartments and kitchen-table work. Both are complete and in budget; a wide live-price gap is a fair final tiebreaker.
How long does a hand-cut miter take a beginner?
A minute or two per cut while learning, including clamping and checking — and the pace halves within the first project or two as the stroke rhythm settles. Speed is a by-product of repeatability; chasing it directly is how cuts wander. Judge your progress by your joints closing, not by your stopwatch. By the end of the first month most beginners are cutting a trim miter, clamped and checked, in well under a minute — not because they hurried, but because the setup became a ritual their hands perform without supervision from their attention.
What is the first project a beginner should build?
A simple pine picture frame — twice. The first is tuition: slow, checked, expected to show a flaw. The second, from the same cheap stock, shows you your own improvement in a single afternoon. Then a shelf with mitered edging, then an octagonal piece for the 22.5° slots, then your first real commission.
Why do my miters gap even with a good kit?
Almost always movement or force: stock that crept because it was hand-held instead of clamped, a box that slid because it was not clamped down, or a blade that bowed under downward pressure. Work the list in that order — clamp the work, clamp the box, lighten the stroke — and read the joint’s shape for which report it is filing, per the diagnostic section above.
When will I know I have outgrown a hand kit?
When your technique is consistent and the tool is the limit: stock too wide for the box, bevels it cannot cut, or cut counts that turn afternoons into weekends. That is the graduation moment — and the hand kit stays useful afterward for small one-off cuts, so the $50 is never stranded.
Is this a safe first saw for a teenager?
With supervision and the rules in the safety section — clamped work, hands behind the fence, scoring strokes to start, saw stored in its box — yes. A hand miter kit is the standard first saw for young woodworkers precisely because its pace is the user’s pace and its stop is instantaneous.