Disclosure: As an Amazon Associate, umtsmarttool.com earns from qualifying purchases. Links to Amazon on this page are affiliate links; they cost you nothing extra. Prices and availability change often, so check the current Amazon listing before you buy.
Where to buy
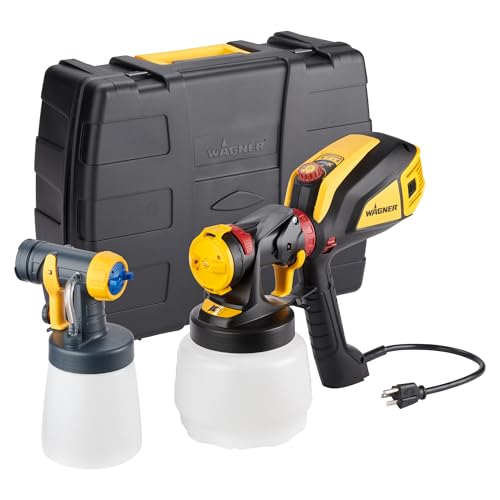
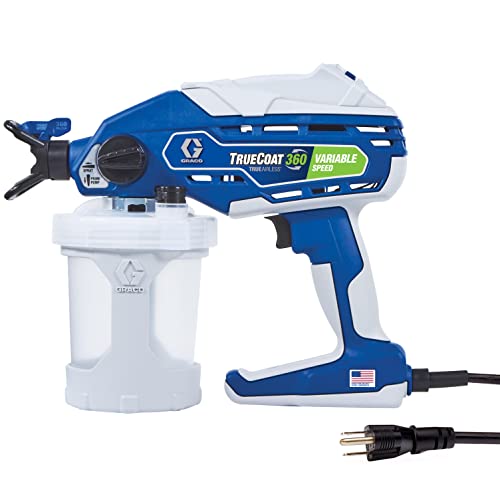
This guide on how to use a paint sprayer is taught on the tools its readers most commonly learn on — the Wagner FLEXiO 595 Handheld HVLP Paint Sprayer for household work, the Wagner Control Spray Max for stationary HVLP, the Graco TrueCoat 360 for handheld airless, and the VONFORN VF803 for budget practice:
- Wagner FLEXiO 595 Handheld HVLP Paint Sprayer — household learning standard — Check on Amazon
- Wagner Control Spray Max HVLP Paint Sprayer — stationary HVLP technique — Check on Amazon
- Graco TrueCoat 360 Handheld Airless Paint Sprayer — airless technique — Check on Amazon
- VONFORN VF803 HVLP Paint Sprayer — budget practice — Check on Amazon
Read the full guide ↓
How to Use a Paint Sprayer: From First Setup to Final Coat
Learning how to use a paint sprayer is a sequence, and the sequence matters more than any single skill in it: preparation before atomization, practice before projects, technique before speed. This how-to teaches the whole arc in working order — setup, material preparation, the test-board ritual, the core technique, the coat system, troubleshooting, and cleanup — for the household technologies (HVLP in its handheld and stationary forms, and handheld airless), with the differences flagged where they bind. It assumes the tool is already chosen; readers still at that step belong in How To Choose A Paint Sprayer first, and readers weighing the category itself in Paint Sprayer Pros And Cons. Everyone else: clear a bench, pour a cup of water, and begin where every competent sprayer in the record began — with a session in which nothing can be ruined, because the finish is water and the surface is cardboard. The reward for the patience is the cluster’s standing promise, cashed in the hub guide Best Paint Sprayer Under $100 and everywhere else: a level of finish that visitors assume was bought.
In this guide
Step 1: Set Up the Workspace
Spraying is a place before it is a motion. Outdoors: a calm day, a shaded patch (direct sun flashes finishes dry mid-coat), a ground sheet larger than your ambitions, and the work on a stand at waist height — pieces sprayed at ankle height are finished by a bent operator with a wandering gun. Indoors: the room emptied or its contents centered and shrouded, floors sheeted wall to wall, adjacent surfaces masked, and ventilation arranged as a one-way street — fresh air in, finish-laden air out, with the operator’s respirator fitted before the first atom of finish, not after the first cough. Lay the session out like a cockpit: tool, strained material, stir sticks, the log, a rag, the cleaning bucket staged and filled. Sessions that begin organized end organized; the cleanup you will perform tired at step 8 is being decided now, by the bench you build.
Step 2: Prepare and Strain the Material
Stir — never shake — the finish to a uniform body, then strain it into the cup or a clean intermediate container, every time, without exception for “clean-looking” paint: the strainer is the cheapest insurance in the process, and the clog it prevents is never scheduled. Check the body against your tool’s guidance: HVLP wants the thinner end of honest, airless takes material as it comes within its tip’s rating, and thinning — when the manual calls for it — is done in small, measured, recorded additions, because an unrecorded ratio is a recipe that dies with the session. Fill the container to a working level rather than its brim (weight and slosh are technique’s enemies), assemble, and set the controls to the starting recipe: the tip or nozzle matched to the material, the pattern matched to the work’s shape, the flow at the conservative end. The gun is now loaded with everything except judgment, which the next step installs.
Step 3: The Test-Board Ritual
Before any finish touches the project, it touches the board — a sheet of cardboard, primed scrap, or the project’s own hidden face. Spray a pass, read it, adjust one variable, spray again. Reading the board is a literacy: a pattern heavy at the edges wants pressure or flow rebalanced; a coarse, sandy texture wants more atomization or a thinner body; a wet, sagging center wants distance or pace. Two or three passes converge most recipes, and the converged settings go into the log — tip, pattern, flow, pressure where offered, thinning — in ink, because the board’s lesson is worthless if it evaporates. The ritual feels like delay exactly once: the first time it saves a project, it becomes the part of the process operators refuse to skip, and the mark by which this guide’s readers can be told from the category’s casualties. Never spray a project you have not first sprayed in effigy.
Step 4: The Core Technique — Distance, Pace, Trigger Discipline
Three variables, held constant, make the finish. Distance: the manual’s band — a hand’s span for HVLP, roughly double for airless — held as if the gun rode a rail; most texture defects are distance that wandered. Pace: a walking, even traverse, begun before the work’s edge and ended after it, with each pass overlapping the last by about half — the fan’s soft edges are designed to marry there. Trigger discipline: the gun is moving whenever the trigger is open, always, without exception — a stationary triggered gun deposits a sag in under a second, and the habit of moving first and triggering second is the single motion that separates operators from owners. Hold the gun perpendicular to the surface, flexing the wrist only as the manual’s fan demands; spray into corners and profiles first, then the flats; and keep the container’s pickup oriented as its design requires when angles tilt. Technique at this level is not talent — it is three constants and the refusal to improvise them, which is why it can be taught in a page and learned in a month.
Step 5: The Coat System — Thin, Even, Patient
Spraying’s finish quality is a system of coats, not a coat: two or three thin, even applications, each allowed its specified flash or dry interval, will out-finish any single heroic pass — because thin coats level, heavy coats sag, and the atomized film’s whole virtue is how gracefully it builds. Between coats, inspect in raking light; correct texture with the next coat’s settings rather than with sandpaper heroics, reserving abrasion for genuine defects (a nib, a run caught late) and always at the manual’s grit and gentleness. Rotate pieces between coats so every face receives its passes at the stand’s best angle. The patience this step demands is the process’s true tuition — operators in a hurry manufacture the defects the troubleshooting table then charges them to repair — and it is repaid in the only currency that matters: surfaces that need no excuses in morning light.
Step 6: Troubleshooting at the Board and on the Work
Problem: orange-peel texture. The film landed too dry or too coarse — move closer within the band, raise atomization (pressure or a finer tip), or thin the material a measured step; verify on the board before the work. Problem: runs and sags. Too much film in one place — the trigger stood still, the pace slowed, or the flow is set heroically; lighten the coat, keep moving, and let the coat system do the building. Problem: spitting or pulsing. Air or obstruction in the fluid path — check the pickup’s seal and orientation, the container’s level, and strain again; a spit is the tool asking for the preparation step it was denied. Problem: dry, dusty overspray haze on adjacent work. Distance too great or pressure too high for the setting — close in, soften, and reconsider the masking that should have caught it. Problem: clogging. Strain, always; clear by the manual’s method only (airless tip reversal exists for exactly this), and never with wire or pins near a nozzle’s precision edges. Every entry in this table is a preparation or technique entry wearing a symptom’s name — which is the troubleshooting section’s real lesson, and the reason it sits after the technique steps rather than before them.
Step 7: The Session’s End — Cleaning as Technique
Cleanup is the final technique, and it is performed to a standard, not to a mood: flush the fluid path with the appropriate cleaner until it runs clear, disassemble to the manual’s field-strip depth, wash and inspect the tip or nozzle (the process’s crown jewel), clean the filters, and wipe the exterior before finish dries on it into archaeology. Airless adds its pump-protection ritual for storage; HVLP adds its cup-and-seal inspection; both add the log entry — the session’s recipes, defects, and lessons, written while they are still true. Then the tool goes back to its bin or shelf complete, dry, and ready, because the next session’s setup quality is being decided by this session’s put-away. Operators who treat step 7 as optional discover, one clogged morning at a time, that it was the load-bearing step — the one on which the tool’s decade, and the operator’s enthusiasm, both rest.
The Key Takeaways Box
Key takeaways: (1) The board before the project, always — five minutes of cardboard is the cheapest tuition in finishing. (2) Three constants make the finish: distance, pace, and a gun that never sprays standing still. (3) Thin coats, plural, patiently — the system is the quality. (4) Strain everything, log everything; the two habits compound longer than any skill. (5) Cleanup is technique, performed tonight, to a standard — the next session and the next decade both start there.
Technique by Technology: The Differences That Bind
The core steps transfer across the category, but each technology amends them at specific points, and the amendments are where competent HVLP operators ruin their first airless session and vice versa. HVLP handhelds forgive: their low pressure tolerates distance wander, their cleanup is minutes, and their failure modes announce themselves gently — which is why the curriculum starts there. Their binding amendment is material body: the thinning discipline and the tip choice carry loads that airless shrugs off. Stationary HVLP adds the pressure dial to the recipe and the hose to the choreography — the gun hand stays light, the body learns to manage the tether, and the settings’ repeatability becomes the technology’s gift to production work. Handheld airless amends distance (longer), pace (brisker), and above all respect: the injection hazard makes trigger discipline a safety system rather than a quality one, the liner system makes cleanup a swap rather than a scrub, and the coat system compresses because the film arrives faster — thin coats at airless are thinner passes at higher speed, a rhythm the board teaches in one session. Pneumatic HVLP, for the compressor shops, amends preparation: air quality (dry, filtered) becomes step 2’s silent partner, and the regulator joins the recipe’s documented variables. Learn your own technology’s amendments on the board, in the curriculum’s first week, and the core technique will feel — as it should — like one skill with dialects rather than four skills at war.
Spraying Specific Work: Furniture, Walls, Fences, Cabinets
The steps specialize gracefully, and the guide annotates the four commonest jobs. Furniture: the stand and rotation are the technique — every face presented flat to the gun in turn, profiles first, the piece turned between coats rather than the gun acrobatted around it; thin enamels, fine tips, and the raking light kept close. Walls: the plane’s choreography — work in sections the arm can keep constant, maintain the wet edge the finish demands, and let the pattern’s width set the section’s rhythm; back-rolling, where the finish or the substrate calls for it, is a partner technique, not an admission. Fences and exteriors: wind is the co-operator — spray with its cooperation or not at all, mask the plantings and the neighbor’s world, and let the coat system absorb the surface’s thirst in sequence rather than in flood. Cabinets: the finesse summit — doors removed and sprayed flat on stands, the finest tip and the gentlest settings in the recipe book, dust discipline at laboratory standard, and intervals honored like appointments, because cabinet work is where the process’s every virtue is visible at once and every shortcut is visible forever. One technique, four stage directions: the operator who has internalized the steps will find each job reads like a variation they already know how to play.
The First Month: A Practice Curriculum
Skill consolidates on a schedule, and the guide prescribes the one its evidence supports. Week one belongs to water and the board: distance, pace, trigger discipline, pattern reading — an hour or two across several short sessions, because motor learning consolidates between practices, not within marathons. Week two introduces real finish on forgiving work — shop furniture, a fence’s far side, the stool that has survived three households — with the log opened and every recipe recorded. Week three widens the materials: a second finish family, a new tip, the thinning discipline practiced and documented, so the recipe book begins its life as a genuine reference. Week four takes the first real project end-to-end at full process — masking, board, coats, intervals, cleanup, log — at curriculum pace, without apology for the pace. Operators who run the month arrive at its end with the thing no shortcut sells: a technique that survives contact with a deadline, because it was built in calm and merely used under pressure thereafter. The month’s total cost is a few hours and some cardboard; its alternative — learning on the kitchen cabinets — costs what it costs.
Safety as a Step, Not a Slogan
The how-to integrates safety into the sequence where it belongs — at the steps where the hazards live. At setup: the respirator fitted and sealed, eye protection on, the ventilation path established before atomization exists to be ventilated, and old coatings treated with the suspicion their era deserves (test, and follow the applicable guidance, before disturbing suspect finishes). At material preparation: solvents and their vapors respected as the chemistry they are, rags with finish on them handled and stored against spontaneous combustion exactly as their labels instruct, and the workspace’s ignition sources audited with the same pencil that writes the lists. At the spraying steps: airless’s injection rule held absolute — never a hand near the tip, never a leak checked by touch, the guard on and the trigger discipline doubling as the safety system it secretly always was. At cleanup: the waste stream handled as the labels direct, because the process’s chemistry does not stop being chemistry when the spraying stops. None of this is decoration on the technique; it is the technique, at the points where the technique touches the operator — and a how-to that taught the motions without it would be teaching half a craft.
Maintenance Between Sessions: Keeping the Tool Honest
Use and upkeep meet at the bin, and the guide’s final procedural section covers the between-session disciplines that keep a sprayer at its specification. Store the tool clean, dry, and complete, with seals inspected at the intervals the manual names and replaced at wear rather than at failure — a seal changed on a Tuesday is maintenance; the same seal discovered on a Saturday is a ruined session. Keep the wear parts stocked one deep (tip or needle set, seals, filters, strainers), because parts velocity is a technique too: the operator who can restore the tool in ten minutes maintains standards the parts-waiting operator quietly lowers. Exercise stored tools on the manual’s schedule for the technologies that ask it, protect pumps as their makers direct through idle seasons, and let the log carry the maintenance record alongside the recipes — one book, whole tool. The reward is the category’s quietest pleasure: a sprayer that, in year five, sprays like the one in the curriculum’s week one, because nothing about it was ever allowed to become a surprise.
Reading the Fan: Pattern Literacy in Depth
Step 3 introduced the board; this section teaches its language fluently, because pattern literacy is the diagnostic skill on which all mid-session judgment depends. A healthy fan is an even gradient — dense at the center, feathering at the edges — and its printed shape on the board is a report on the entire system upstream of it. Tails — heavy lines at the pattern’s edges — report atomization insufficient for the material’s body: pressure up, tip finer, or body thinner, one at a time. A pattern heavy in the center reports the opposite family: flow outpacing atomization, or distance collapsed below the band. A fan that pulses reports supply — pickup, level, seal, or a filter quietly strangling the path. A fan skewed to one side reports asymmetry at the nozzle itself: a partial obstruction or damage, addressed by cleaning and inspection, never by compensating with the wrist. The literacy’s method is invariant: read, hypothesize one cause, change one variable, read again. Operators who change two variables at once learn nothing per pass and arrive at working settings by luck, which does not log, does not repeat, and does not survive a material change. Operators who read fluently converge in two or three passes on any finish the tool can spray — and know, when the fan refuses to converge, that the material or the tip is outside the tool’s honest envelope, which is also a reading, and the one that saves projects.
The Body’s Technique: Stance, Arm, and Endurance
How-tos under-teach the operator’s body, and spraying — an arm’s-length, hour-long, repetitive craft — punishes the omission. Stance first: feet planted in the direction of travel, the body moving with the pass rather than reaching from a fixed point, because a reaching arm is a wandering distance and a wandering distance is texture. The arm works from the shoulder in long passes, the wrist reserved for the small corrections profiles demand; short, wristy spraying tires in minutes and shows in the film. Weight management is technique: a full cup at the session’s start is the heaviest the gun will be, so the hardest passes (ceilings, high work) are scheduled early or the container is filled partially and refilled — a legitimate rhythm the log can plan. Breaks are part of the sequence, taken between coats where the intervals welcome them, and the operator who sprays tired sprays defects: fatigue’s first symptom is not soreness but sloppiness, a trigger held a half-second long, a distance forgiven. Finally, the second operator’s body counts too — the helper managing hose, stand rotation, and material is performing technique, and sessions run best when the roles are choreographed rather than improvised. The finish is made by a body before it is made by a tool; train both, and the board will show the difference within a week.
Materials Handling in Depth: Thinning, Mixing, and Records
Step 2’s discipline deserves its own depth pass, because material is the variable beginners respect least and the finish forgives last. Thinning, when the manual and the material call for it, is a measured act: the manufacturer’s stated proportions as the starting frame, small additions, each stirred to uniformity and each tested on the board before the next — because viscosity’s effect on the fan is immediate and readable, and guessing past the board’s verdict is how batches are ruined at scale. Mixing across containers (boxing) keeps color and body uniform across a large job’s refills; the operator who tops up from a fresh can mid-project has scheduled a visible seam at the refill line. Temperature is material handling too: finish stored cold sprays thick and finishes reluctantly, and the session that begins with material at working temperature begins one adjustment ahead. And the record binds it all: batch, thinning steps, temperature notes, the recipe the board approved — the log’s material pages are what make the second gallon, the second season, and the second operator all spray the same finish as the first. A sprayer is a machine for repeating a film; the materials discipline is what gives the machine something worth repeating.
From Competence to Fluency: The Second Season
The curriculum produces competence in a month; fluency — the state where technique disappears into results — is the second season’s work, and the guide maps it so its readers recognize the road. Fluency’s marks are specific: the board ritual compresses to two passes because the eye reads faster; recipes transfer between finishes by analogy rather than by search; defects are diagnosed mid-pass from the fan’s sound and feel before the film shows them; and the coat system adapts itself to weather, substrate, and deadline without anxiety, because the variables are understood as a system rather than memorized as rules. The road there is volume under the log — sessions counted in dozens, each one leaving its record — and the deliberate widening of one variable at a time: a new material family per month, a new geometry per project, the station’s pressure craft or the airless rhythm layered onto the handheld foundation. Nothing in fluency’s map is talent. It is the curriculum, continued — which is the how-to genre’s deepest claim, and the one this page is content to rest on: the distance between the first session’s cardboard and the fifth year’s cabinets is not a gift some operators receive, but a sequence any operator can walk.
A Complete Session, Narrated
The steps, assembled: a Saturday, a set of kitchen chairs, a mid-tier HVLP handheld, and an operator in week six of the practice. The bench is laid before the kettle boils — tool, strained enamel, board, log, staged bucket — and the chairs stand on the sheet in spraying order, backs to the light. The board takes three passes: the first tails slightly, the flow eases, the second prints clean, and the recipe goes into the log in ink. Chairs one and two take their first coats at the curriculum’s pace — profiles first, flats after, the gun moving before it speaks — and rotate to the drying rack while three and four are masked at their one delicate joint. The interval is spent inspecting in raking light and finding, on chair two, a nib that a fingertip’s patience removes. Second coats marry at the overlaps; the fan, re-read at the refill, asks for nothing. The last chair’s final pass ends, the trigger discipline unbroken for one more session, and cleanup begins while the light is still good: flush, strip, inspect, log — the session’s defects (one), lessons (the flow setting runs a notch lower than the book said), and next session’s note (buy strainers) all written before the tool is shelved, complete and dry, in its bin. Total elapsed: an unhurried morning. Total drama: none — and the absence of drama, the operator now understands, was the technique.
A Note on Method: How This Guide Was Built
The guide’s method, stated for the record as this series requires: a research-led synthesis. The step sequence and its parameters — distances, overlaps, coat discipline, cleaning order — were drawn from manufacturer operating documentation across the category’s classes (the manuals remain the primary authority for any specific tool, and this guide defers to them wherever they differ), cross-checked against the documented practice of experienced operators and the cluster’s own verified tool pool. No hands-on testing is claimed; no prices or ratings are printed, per standing rule; and the troubleshooting entries are confined to causes and corrections that the documentation and the physics jointly support. Readers should treat their own tool’s manual as the senior document in any conflict — the guide teaches the craft’s grammar, the manual speaks its dialect, and the board, as always, has the final word.
Teaching Someone Else: The Technique, Transferred
A how-to’s final examination is whether its reader can teach it, and spraying — unusually teachable among crafts — rewards the attempt within a single session. The transfer protocol mirrors the curriculum at double speed: the student sprays water at the board while the teacher names the constants aloud (distance, pace, moving trigger), corrects one variable at a time, and resists — this is the hard part — taking the gun. The student’s first real finish goes onto forgiving work with the teacher managing everything except the gun: material, masking, intervals, cleanup staged and waiting, so the student’s whole attention can live in the three constants. The log gains a second hand, and with it the household gains the thing this series keeps circling: redundancy — a practice that survives one operator’s busy season, an enthusiasm that compounds across people. Households that teach the technique report the same discovery in different words: the steps, said aloud to a student, finally become obvious to the teacher. It is the oldest finding in instruction, and the guide offers it as the curriculum’s true graduation — the session where the reader of a how-to becomes its author.
The Session Checklist
For the bench’s wall, the whole guide on one card. Before: workspace set and ventilated, respirator fitted, work on stands, masking complete, bucket staged. Material: stirred, strained, body checked, thinning measured and noted, container at working level. Board: passes sprayed, fan read, one variable at a time, recipe inked in the log. Spraying: profiles first, distance constant, pace even, gun moving whenever triggered, overlaps at half, coats thin and plural. Intervals: raking-light inspection, defects noted for the next coat, pieces rotated. After: flush to clear, field-strip, tip inspected, filters cleaned, log completed, tool shelved dry and whole. Six lines, and every section of this guide exists to explain one of them — which is the relationship between checklists and crafts everywhere: the card is short because the understanding behind it is long, and the operator who has read the long version will find the short one sufficient for a decade.
Common Mistakes When Learning
Skipping the board. Every defect the board would have announced is instead announced by the project, at the project’s price. The ritual is five minutes; its absence is a refinishing.
Triggering while stationary. The sag is instantaneous and the habit is formed in the first hour or fought for a season. Move first, trigger second, release before stopping — in that order, every pass, forever.
One heavy coat. The coat system’s patience is the finish’s quality; impatience is texture, runs, and a longer day. Thin, even, patient wins every comparison the raking light conducts.
Chasing defects with the gun. A flaw spotted mid-coat is corrected by the next coat or by abrasion after drying — never by hovering extra film onto it live, which manufactures a worse flaw at higher speed.
Cleaning “tomorrow.” There is no tomorrow in a fluid path; there is only tonight’s five-to-fifteen minutes or a future hour with a pick and a prayer. The full catalogue of ownership errors, beyond technique, is gathered in Is A Paint Sprayer Worth It and the cluster’s tier guides.
Frequently Asked Questions
What should a beginner spray first?
Water, at cardboard — then a forgiving project in a forgiving finish: a shop stool in enamel, a fence section in stain, anything whose success is visible and whose failure is a sanding, not a sorrow. The curriculum’s order (water, board, forgiving, widening) is the learning curve’s shortest known path, and skipping its early steps lengthens rather than shortens the road.
How far should the sprayer be from the surface?
Within your manual’s band — roughly a hand’s span for HVLP guns, about twice that for airless — and, more importantly, constant: a steady distance at the band’s edge outperforms a wandering distance at its center. Practice the rail-gun feeling on the board until the arm holds it without supervision.
How many coats does spraying need?
Usually two or three thin ones, at the finish manufacturer’s stated intervals — the system this guide teaches. A single heavy coat is the beginner’s signature error: it sags, textures, and dries slowly, while the thin-coat system levels, marries at the overlaps, and reaches a better finish in less total material.
Why does my finish look like orange peel?
The film is landing too dry or too coarse: distance too great, atomization too low for the material’s body, or the finish too thick for the tip. Correct one variable at a time on the test board — closer, finer, or a measured thinning step — and log the recipe that clears it; the peel is a settings message, not a talent verdict.

How long does cleanup really take?
The manual’s minutes — a short flush-and-strip for handheld HVLP, longer for stations and airless with their hoses and pump care — provided it happens immediately, with the staged bucket and the log at hand. Deferred cleanup takes as long as it wants, which is why the process stages the bucket in step 1 and treats step 7 as technique rather than housekeeping.
Final Recommendation
Use the sequence and the sequence will teach you: workspace, strained material, the board, three constants, thin coats, honest troubleshooting, and a cleanup performed like it matters — because it is the step the next decade stands on. The tools this guide taught on — the Wagner FLEXiO 595 for the household standard, the Wagner Control Spray Max for stationary practice, the Graco TrueCoat 360 for airless technique, and the VONFORN VF803 for budget repetition — will each carry the curriculum faithfully. What carries the operator is the ritual: a board before every project, a log after every session, and the patience to let thin coats do what no single pass can. Spray in that order, and the finish that visitors assume was bought becomes, session by session, simply how your household’s surfaces look.
Begin this week, with water. The first session asks for nothing that can be lost — a cup of water, a sheet of cardboard, twenty minutes — and it returns the only thing the rest of the craft is built from: the feel of a constant distance, an even pace, a trigger that opens only on a moving gun. Every fluent operator in the record has stood exactly there, watching a fan of water print its gradient on cardboard and learning to read it, and none of them were born reading it. The board is the great equalizer of this category, and it is waiting, at zero stakes, for its next student.
Then run the month. Forgiving work, a widening shelf of finishes, the log filling with recipes that turn strangers’ surfaces into repetitions — and somewhere in the third or fourth week, unannounced, the moment the whole sequence exists to produce: a pass that lays down so level and so even that the operator stops, not to fix anything, but to look. That look is the craft’s wages. Everything after it — the cabinets, the fence in a morning, the rooms that stop being apologies — is that moment, repeated at scale, by hands that learned in order.
Keep the checklist on the wall and the log in the bin, and let the two of them do what paper does best in a craft: remember, so that the operator can attend. Attend to the fan, to the light raking across the wet film, to the small sound a healthy tool makes when everything upstream of it has been done properly. The steps will become habits, the habits will become standards, and the standards — this is the part no one believes at the cardboard stage — will become invisible, until a visitor runs a hand across a door and asks where it was bought.
That question is the finish line of this how-to, and it is closer than it looks from the first session. It stands exactly one curriculum away: eight steps, four weeks, a few sheets of cardboard, and the patience to let thin coats and honest logs do their compounding. Pour the water. The board is ready when you are.
And when the first real project is behind you — cleaned, logged, and drying in good light — take the session’s last minute for the habit that ties this guide to everything else in the cluster: write down what the next session should know. A setting, a warning, a small triumph, in the log’s plain hand. Technique compounds through exactly such minutes, and a year of them is the difference between an operator who owns a sprayer and an operator who is one. The guide has given you the sequence; the log will give you the mastery; the surfaces of your house, one level coat at a time, will give you the evidence.
Setup, material, board, constants, coats, correction, cleanup. Seven movements, learned in a month, kept for a decade — and behind every one of them the same unglamorous truth this guide has repeated until it hopes the repetition reads as respect: spraying is not a talent that some hands have, but a sequence that any hands can hold, provided the sequence is honored in order and the order is practiced in calm. Honor it, and the tool in your hand becomes the least interesting part of the finishes it leaves behind — which is, and has always been, the point of learning to use it well.
Start, then, the way the record’s best operators all started: not with a project, but with a practice — water, cardboard, patience, and a pencil for the log. The projects are already waiting, patient as fences. They can wait one more month, while the hands learn the order that will finish them properly for the next twenty years.
Distance, pace, a moving trigger. Strain, board, log. Thin coats, honest intervals, cleanup tonight. The whole craft fits in those three short lines — and the rest of this guide, all its steps and tables and narrated Saturdays, is only those lines, unfolded. Fold them back into habit, one session at a time, and they will carry every surface you ever point them at.
One session is all it takes to begin, and beginning — with water, with cardboard, with the log’s first blank page — is the only step in this entire guide that cannot be improved by reading about it longer. The steps are above. The bench is yours. Spray something forgiving, write down what happened, and join the long, quiet company of operators whose finishes need no introduction.
The first coat you ever spray will not be your best. The fiftieth, if the log has been kept and the board has been honored, will be so much better that the distance between the two will read like a different operator’s work. That distance — measurable, repeatable, entirely earned — is what this how-to is selling, and its price is only the sequence, followed.
Follow it once, end to end, on something small. Then follow it again. By the third time, the steps will have stopped feeling like instructions and started feeling like the way spraying is simply done — in your garage, by your hands, to your standard.
That is the whole promise, and it is kept by everyone who keeps the sequence: a sprayer used well is a quiet machine, and the finishes it leaves are the loudest thing about it.
Water first. Board second. Project third. Log always. The order is short enough to memorize and strong enough to build a decade of finishes on — beginning with the next session you run.
Run it slowly, run it in order, and write it down — the craft is nothing more, and nothing less, than that — practiced patiently, session after session, year after good long year ahead now.