Spoon carving needs two kinds of blades: a straight knife for shaping the outside and a curved hook knife for hollowing the bowl. Beginners usually start with a set that pairs them so the first spoon takes shape without much shopping around. Sharpness out of the box matters, and a sturdy handle helps with long sessions.
The six sets below mix complete spoon kits with stand-alone Morakniv knives that carvers often combine into a set. We have not used these products ourselves, so confirm the exact tools included and the steel on the current listing before buying. A protective glove is a smart purchase.
As an Amazon Associate we earn from qualifying purchases. Links below are affiliate links, and they do not change the product information we give.
What to Look For
| Feature | Why it matters |
|---|---|
| Hook knife | A curved blade is needed to hollow the bowl |
| Straight knife | A short fixed blade shapes the outside and handle |
| Handle | Wood or comfortable grips reduce fatigue |
| Sheath or guard | Safe storage protects both the blade and your fingers |
| Sharpness | A keen edge cuts wood cleanly and is safer than a dull blade |
In this guide
Specs at a Glance
| Set | Contents | Handle | Notes |
|---|---|---|---|
| BeaverCraft Spoon Carving Tools Set | Knives and hook knife | Wood | Starter kit with accessories |
| BeaverCraft Wood Whittling Kit | Straight knives | Wood | Beginner whittling kit |
| Morakniv Wood Carving Hook Knife 164 | Double-edge hook knife | Wood | Popular spoon carver’s hook |
| Morakniv Wood Carving Hook Knife 162 | Single-edge hook knife | Wood | Right-handed single edge |
| Morakniv Wood Carving Knife 106 | Straight knife | Wood | Classic carving blade |
| Flexcut Carvin’ Jack | Folding multi-blade | Wood | Folding carving tools |
The 6 Best Spoon Carving Knife Sets
Top pickBest for first-time spoon carvers
1. BeaverCraft Spoon Carving Tools Set
A complete beginner kit from a woodcarving tool brand, with a hook knife, a straight knife and accessories in a case. It is aimed at carvers who want everything in one purchase. Treat the exact contents as something to confirm on the listing, since kits change over time.
Suits: first-time spoon carvers. Strengths: a bundled kit with accessories. Weaknesses: contents differ by listing. Skip it if you already own tools.

Best for whittlers also starting spoons
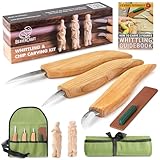
2. BeaverCraft Wood Whittling Kit
A set of straight knives and a few extras for general whittling. It is better for shaping handles and outer curves than for hollowing bowls. Pair it with a separate hook knife if you want to finish a full spoon.
Suits: whittlers also starting spoons. Strengths: a variety of knife shapes. Weaknesses: there is no deep hook by itself. Skip it if you need a bowl-hollowing tool.
Best for bowl hollowing
3. Morakniv Wood Carving Hook Knife 164
A double-edged curved hook knife from a Swedish maker known for sturdy carving blades. It works in either direction and suits ambidextrous carvers. The two edges let you pull the cut toward you or push it away without turning the tool over.
Suits: bowl hollowing. Strengths: a sharp curved blade from a trusted maker. Weaknesses: the shape takes practice. Skip it if you want a straight knife.

Best for right-handed carvers
4. Morakniv Wood Carving Hook Knife 162
A single-edged hook knife designed for right-handed use. The curve allows controlled cuts when hollowing a spoon bowl. Many carvers keep one beside the double-edge model for variety.
Suits: right-handed carvers. Strengths: a controlled, single-edge cut. Weaknesses: not for left-handed use. Skip it if you carve left-handed.

Best for outer shaping
5. Morakniv Wood Carving Knife 106
A short fixed-blade knife with a comfortable handle, used to shape the outside of a spoon and to carve handles. It is a standard pick for beginners. The handle is a comfortable size for long strokes.
Suits: outer shaping. Strengths: a simple, sturdy straight blade. Weaknesses: it does not hollow bowls. Skip it if you want a hook knife.

Best for portable carving
6. Flexcut Carvin’ Jack
A folding carving tool with multiple blades in one body, built for whittling and general carving. It travels easily and offers some variety. Folding blades are convenient, though they limit how deeply you can hollow.
Suits: portable carving. Strengths: several blades in one folder. Weaknesses: it is not a dedicated spoon kit. Skip it if you want a bowl-hollowing hook.

Care and Setup
- Strop the edge often to keep it sharp.
- Store blades in sheaths.
- Wear a cut-resistant glove on the holding hand.
- Wipe tools dry and apply oil if you leave them idle.
Mistakes to Avoid
- Carving toward your hand or body.
- Working with a dull edge.
- Choosing a hook knife for the wrong hand.
- Skipping a glove.
How a Spoon Takes Shape, Step by Step
Knowing the order of work helps you judge which tools you need first. A spoon usually starts as a split section of a branch or a thick blank. If you start with a small piece, you can skip heavy chopping tools and work with knives alone, but a larger blank is normally roughed out with a hatchet or a saw. The first knife work defines the outline: you cut away wood from the sides of the handle and the shape of the bowl while the piece is still thick.
Next, you refine the profile, taper the handle and thin the neck with a straight knife. Only then do you hollow the bowl with a hook knife, because the bowl is easier to hollow when the outside shape is nearly right. Finally you smooth the curves with light slicing cuts, sand if you like, and apply a finish. A kit with only straight blades can complete the first stages, and a hook knife is required for the third.
- Roughing out: removes large amounts of wood and sets the outline.
- Shaping: a straight knife works the handle, neck and back of the bowl.
- Hollowing: the hook knife scoops out the bowl in thin shavings.
- Finishing: light cuts, then optional sanding and oil.
Plan around this sequence when you pick a set, and do not expect one blade to do every job.
Safe Grips and Body Position
Most carving injuries come from a knife slipping toward the holding hand or the body. Learn a few controlled grips before you start. In a basic forward cut, you hold the knife in your dominant hand and push the blade away from you through the wood. In a thumb-pivot cut, your other thumb braces against the back of the blade as you rotate your wrist, which gives fine control for small shaving cuts. In a pull cut, you draw the knife toward a braced thumb, which should stay behind the edge.
Keep your body out of the blade’s path. Sit with your elbows supported on your knees or on a bench, and rest the work against a stable surface. Never place a hand or leg directly in line with the cut. A hook knife is pulled toward you in many cuts, so keep your hands out of the path and use the stopping point of your arm, such as your knee or a braced thumb, to prevent overshoot.
Wear a cut-resistant glove on the holding hand, as the care notes suggest, and consider a thumb guard. Carve in good light and take breaks when your hands tire, since fatigue leads to slips. If wood is too hard or the edge feels dull, stop and fix that instead of pushing harder.
Choosing Wood for Your First Spoons
Wood choice changes how easy a spoon is to carve. Fresh, undried wood, often called green wood, is soft and cuts easily, so it is kind to both the beginner and the blade. As wood dries it hardens, and seasoned hardwood can be tough on a knife and a wrist. Many beginners prefer a softer hardwood or a fruitwood that carves cleanly and takes a smooth finish.
Look at the grain. A straight-grained blank carves predictably, while wood with knots, splits or swirling grain can tear and be difficult to control. Choose a blank free of cracks, and keep the grain running along the handle, since a handle that cuts across the grain will be weak and may snap. A branch with a natural curve can match the curve of a spoon and save work.
Think about the food use if you plan to eat with the spoon. Avoid woods that are known irritants or toxic, and avoid any wood that has been treated or painted. If you are unsure about a species, check a reliable reference or ask a local woodworker. Keep green wood in a bag or damp cloth to slow cracking if you cannot finish in one session, and dry finished spoons slowly away from direct heat.
Sharpening, Stropping and Keeping a Keen Edge
Carving depends on a sharp edge, and sharpening is part of the craft. A sharp knife slices with light pressure, leaves a shiny cut surface and is safer, while a dull one slips and needs force. Watch for signs of dullness: tearing fibres, a rough surface or a need to press harder. At that point, strop the edge, and if stropping no longer helps, go to a stone.
For a straight knife, draw the blade along a leather strop loaded with a fine compound, with the edge trailing behind the spine, keeping the angle the same as the factory bevel. A few passes on each side often bring it back. Use a fine stone or sharpening system for bigger repairs, keeping a consistent angle, and follow with the strop to remove the burr.
A hook knife is harder to sharpen because of the curve. A rolled strop, a small round sharpening stick or a slip stone shaped to fit the inside of the curve is generally used, and with a single-edge hook you sharpen only the bevel side and polish the flat. A double-edge hook has two bevels to maintain. Take your time, work gently and test on a scrap of wood. Check the maker’s guidance on the specific steel, since some are easier to sharpen than others.
Finishing Spoons and Growing Your Tool Kit
Once the spoon is carved, you can leave the tool marks, which many people like, or sand it smooth. Start with a medium grit and work toward a fine one, always sanding along the grain, and wipe away dust before finishing. For a spoon used with food, people commonly use a food-safe oil, but check that the product is labeled for that use and follow its instructions for curing.
Do not soak a wooden spoon, and avoid the dishwasher. Wash by hand with mild soap, dry it right away, and rub in a little oil when it starts to look dry. A spoon with cracks or a rough surface that traps food should be retired from kitchen use.
As your skills grow, you may add tools. A second hook knife with a different curve or a deeper bowl can help with different spoon shapes, and a sloyd-style knife can refine details. A small saw and a hatchet may help with roughing out, though they are not needed at the start, and they should be used with the same care as knives. Good habits matter more than a long list of tools, so buy a few that you will use often. Keep a notebook of what you carved and what went wrong, since it will show you what to improve next.
Spoon Carving FAQ
Do I need a hook knife?
Yes, if you want to hollow the bowl. A straight knife cannot do it well.
Which wood is best?
Green or soft hardwoods such as birch or basswood are common choices.
Is a left-handed hook knife available?
Single-edge hooks are handed, while double-edge ones suit either hand.
How should I sharpen?
Use a strop with compound for regular touch-ups and a stone for bigger repairs.
Can I carve a spoon with only a straight knife?
You can shape the outside and handle, but hollowing the bowl is difficult without a hook knife. Most carvers add one early on.
Is a single-edge or double-edge hook knife better for a beginner?
Single-edge hooks are handed, so choose one that matches your dominant hand. A double-edge hook works from either side but takes some getting used to.
What kind of wood should I use first?
Fresh, straight-grained wood without knots is usually easier on the hands and the blade. Avoid treated or painted wood for anything that touches food.
Do I need a hatchet?
Not at the start if you work with small blanks. A hatchet or saw helps with larger pieces, and it needs its own safety habits.
How do I know when my knife is dull?
It tears the wood instead of slicing, needs more pressure and leaves a rough surface. Strop it, and use a stone if the strop no longer helps.
How do I finish a spoon for food use?
Many carvers use a food-safe oil after sanding. Check the product label and the curing time before using the spoon.
Can children carve spoons?
Only with close adult supervision and age-appropriate tools and gloves. Start with an adult, and follow safety guidance.
How do I clean a carved spoon?
Wash by hand with mild soap, dry it right away and oil it occasionally. Do not soak it or put it in the dishwasher.
Reading Grain So the Wood Cuts Cleanly
Almost every frustration beginners feel with a sharp knife comes from the same cause: cutting against the grain. Wood is made of long fibers, like a bundle of straws. Cutting in the direction the fibers rise toward the surface slices them cleanly. Cutting the other way catches and lifts them, leaving a rough, torn surface and sometimes a split that runs past where you intended to stop.
Before each cut, look at the surface and ask which way the fibers run. Small lines on the wood often show the direction. Where they rise toward your knife, you will feel resistance and see tearing. Turn the piece and cut the other way. For a spoon, grain direction changes as you move from the handle to the bowl, so you will often rotate the blank every few strokes. That is normal and does not mean you are doing it wrong.
The bowl is the hardest part. As you hollow, the grain direction changes constantly. A hook knife, such as the Morakniv 162 or 164 listed here, works best when you cut from the rim toward the deepest point of the bowl and rotate the spoon so that you always cut downhill. If the surface is fuzzy, try changing direction instead of pushing harder. Make thinner cuts and let the edge do the work.
Stopping a split is part of the craft too. A knife driven too deep at the end of a cut can split the wood well beyond the line, so use short strokes near the edge of a spoon, and leave extra material until you are confident.
Drying Green Wood and Preventing Cracks
Many carvers prefer fresh, unseasoned wood because it is soft and cuts easily. The catch is that wet wood shrinks as it dries, and if it dries unevenly, it cracks. A carved spoon has thin and thick areas, which dry at different rates, so a little planning protects your work.
- Keep unfinished blanks in a sealed bag or covered with wood shavings between sessions, so they do not dry in the open air while you carve.
- Once the spoon is carved, let it dry slowly in a cool, shaded place with air movement, instead of in sun or near a heater.
- Leave the shape slightly thicker than your final design, then refine when the spoon is dry, because the wood will have moved.
- Avoid pith, the soft center of a branch, in the thin part of the spoon, since it is a common start for cracks.
- Check the spoon after a few days. Hairline cracks near the end of the handle can be sanded out if caught early.
Some carvers rough out several spoons, leave them to dry and finish them later. Others work in one sitting and accept the risk. Neither is wrong. If you are carving as a hobby for gifts, it helps to carve a few extras, because you will learn which pieces tolerate drying and which do not.
Fixed Blades, Folding Knives and What a Set Can Do
The listings here include fixed-blade straight knives, hook knives and a folding carving tool, the Flexcut Carvin’ Jack. They do different jobs, and choosing between them is easier when you picture a spoon’s workflow.
A fixed-blade straight knife, like the Morakniv 106, is the main tool for shaping the outside of the spoon and forming the handle. It has no hinge to flex or fold, which suits firm pressure and long strokes. A hook knife hollows the bowl. A folding knife is a travel-friendly option, with several blades stored inside the handle. It is handy for carving at a campsite or on the go, though a folding mechanism and a shorter reach can limit comfort during long sessions or deep cuts. Before using one, check that the blade locks when open, and never force a cut that makes the hinge carry the load.
When comparing sets, count what you will actually use. A kit with many blades may include shapes you will rarely reach for as a beginner. For spoons, a straight knife plus a hook knife is the core, and everything else is a bonus. Sheaths and a strop are worth checking, because they protect the edges and keep them sharp. If a kit lacks a hook knife, plan to add one, because the bowl is what makes a spoon a spoon.
Fixing Common First-Spoon Problems
Most early spoons share the same handful of problems, and each has a simple fix once you know the cause.
- A bowl that is lopsided: carve evenly from both sides, checking the wall thickness with your thumb as you go. Keep the walls thicker than you think you need until the final passes.
- A handle that feels thick or chunky: look at the spoon from the side, and remove wood from the transition between handle and bowl, where it often stays heavy.
- A rough surface after cutting: it usually means a dull edge or cutting against the grain. Strop the blade, then try a lighter cut in the other direction.
- A bowl wall that is too thin: stop hollowing earlier and shape the outside to match the inside. Thin walls crack and make the spoon unpleasant to use.
- Tool slips: slow down, check your grip and body position, and use a cut-resistant glove on the holding hand.
Keep your first few spoons simple. Choose a short, broad design with a thick handle and a shallow bowl, and focus on clean cuts instead of delicate curves. Each spoon you finish teaches you something about the wood, and by the third or fourth you will know what to change.
Frequently Asked Questions
Why did my carved spoon crack while drying?
Green wood shrinks as it dries, and thin and thick parts dry at different speeds, which can split the piece. Avoid the pith, dry the spoon slowly in a cool, shaded spot, and keep unfinished blanks sealed or covered with shavings between sessions. Hairline cracks near the handle can sometimes be sanded out if caught early.
Can I carve a spoon with a folding knife?
You can shape the outside and handle with a good locking folding knife, though a fixed blade is usually more comfortable for long cuts. A folding tool cannot easily hollow a bowl unless it includes a hook blade. Make sure the blade locks, and never use the hinge as a lever.
How long does a first spoon usually take?
It varies widely with your experience, the wood and the size of the spoon. Many beginners spend a few hours over several sessions on a first spoon, mostly on bowl hollowing. Slow, careful cuts and a sharp edge save time in the end, so do not rush.
How do I stop wood from tearing when I carve?
Tearing usually means you are cutting against the grain or your edge is dull. Look at the surface to see which way the fibers run, then rotate the piece and cut in the other direction. Use thinner cuts, strop the blade, and work downhill toward the center of the bowl.
The Short Version
For a complete kit, the BeaverCraft Spoon Carving Tools Set. For general whittling, the BeaverCraft Whittling Kit. For either hand, the Morakniv 164. For right-handed hollowing, the Morakniv 162. For outer shaping, the Morakniv 106. For portable use, the Flexcut Carvin’ Jack.