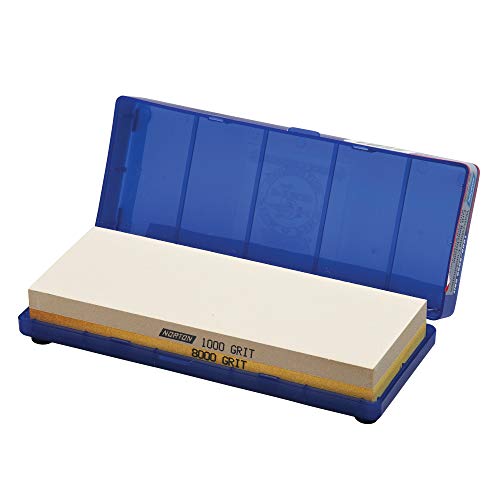
Home cooks usually want a sharpener that is quick, safe and easy to store. Manual tools fit that brief because they need no outlet and are quiet, and several remove metal slowly enough that they are gentle on good kitchen knives. A sharp knife also makes prep safer, since a dull edge needs more pressure and tends to slip. A few minutes of upkeep can change how often you reach for the knife block.
The six picks below range from a rolling sharpener and pull-through tools to a simple stone kit. Think about the knives you own, because chef’s knives, santokus and paring knives differ in edge angle and thickness. If you have a mixed set, a tool with two stages or an adjustable guide usually gives you the most flexibility. Keep the tool within reach and make a habit of a quick session once a month so you rarely face a truly dull blade. We have not used these products ourselves, so confirm the details on the current listing before you buy.
As an Amazon Associate we earn from qualifying purchases. Links below are affiliate links, and they do not change the product information we give.
What to Look For
| Feature | Why it matters |
|---|---|
| Ease of use | Pull-through and rolling tools are quick; stones need practice |
| Edge angle | Match the tool to the angle of your knives |
| Footprint | Compact tools fit in a drawer; rolling kits sit on the counter |
| Finish | A fine stage leaves a smoother, longer-lasting edge |
In this guide
Specs at a Glance
| Sharpener | Type | Style | Notes |
|---|---|---|---|
| Horl 2 Rolling Knife Sharpener | Rolling sharpener | Magnetic angle holder | Diamond and ceramic discs |
| Chef’sChoice Pronto Manual Diamond Hone | Pull-through | Two stages | Diamond abrasive |
| Rada Cutlery Quick Edge Knife Sharpener | Pull-through | Carbide inserts | Compact |
| Zwilling Pull-Through Knife Sharpener | Pull-through | Two stages | Compact base |
| Chef’sChoice Asian Manual Knife Sharpener | Pull-through | Fine angle | Diamond abrasive |
| Lansky Deluxe 5-Stone Controlled-Angle Sharpening System | Guided kit | Five stones | Clamp holds the blade |
The 6 Best Manual Knife Sharpeners for Home Cooks
Top pickBest for cooks who like a ritual
1. Horl 2 Rolling Knife Sharpener
A German-designed rolling sharpener where a magnet holds the knife at a set angle while you roll the tool along the blade. It has a following among serious home cooks.
Suits: cooks who like a ritual. Strengths: neat angle control and stylish design. Weaknesses: best for straight edges. Skip it if you want the simplest option.

Best for everyday kitchen use
2. Chef’sChoice Pronto Manual Diamond Hone
A manual two-stage sharpener from Chef’sChoice, a well-known maker of electric and manual tools. It uses diamond abrasive in a compact housing with a guide.
Suits: everyday kitchen use. Strengths: trusted brand and easy use. Weaknesses: fixed angle. Skip it if you want to customize angles.
View Chef’sChoice Pronto on Amazon
Best for quick upkeep
3. Rada Cutlery Quick Edge Knife Sharpener
A simple, American-made sharpener from Rada Cutlery that sharpens with a quick pull. It is easy to hold and store.
Suits: quick upkeep. Strengths: simplicity and low learning curve. Weaknesses: aggressive on fine blades. Skip it if you own thin or delicate knives.

Best for zwilling owners
4. Zwilling Pull-Through Knife Sharpener
A manual pull-through sharpener from the German brand Zwilling, built to complement its own knives. The compact body sits on the counter or in a drawer.
Suits: Zwilling owners. Strengths: brand match and simple use. Weaknesses: fixed angle. Skip it if you own Japanese blades.
View Zwilling Pull-Through on Amazon
Best for santoku and gyuto owners
5. Chef’sChoice Asian Manual Knife Sharpener
A manual sharpener from Chef’sChoice designed around the narrower edge angles on Asian-style knives. It suits cooks with santokus and similar blades.
Suits: santoku and gyuto owners. Strengths: correct angle for thin blades. Weaknesses: not ideal for thick German edges. Skip it if you own mostly German knives.
View Chef’sChoice Asian Sharpener on Amazon
Best for patient cooks and tinkerers
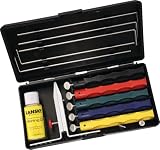
6. Lansky Deluxe 5-Stone Controlled-Angle Sharpening System
A guided kit with a clamp and multiple stones. It takes longer than a pull-through tool but gives you full control over the angle.
Suits: patient cooks and tinkerers. Strengths: control over angle and grit. Weaknesses: slow and takes space. Skip it if you want a quick fix.
Care and Setup
- Rinse and dry the tool after use, following the maker’s directions.
- Keep rolling sharpeners in their box to protect the discs.
- Hone regularly so you sharpen less often.
- Check the angle guides after drops.
- Wipe your knife on a cloth before slicing food.
Mistakes to Avoid
- Using a coarse tool too often.
- Sharpening serrated blades with the wrong tool.
- Not matching the tool to the knife’s angle.
- Pressing the blade hard against the abrasive.
- Skipping a trial run on an old knife.
A Realistic Sharpening and Honing Rhythm
Home cooks rarely need to sharpen often, but they benefit from a simple routine. The most useful habit is honing, which realigns a slightly bent edge. A quick pass on a honing rod or a fine stage before or after cooking keeps most knives feeling crisp. True sharpening, which removes metal, is only needed when honing no longer restores the cut.
How often that happens depends on how much you cook, what you cut and what you cut on. Cutting boards matter a great deal. Wood and soft plastic are gentler than glass, stone or ceramic, which dull an edge quickly. A knife used daily on a good board may need sharpening a few times a year, while a rarely used one may last much longer. Learn the signs instead of following a calendar. If the knife skids on a tomato skin, crushes herbs or needs extra pressure on onions, it is time.
Plan your routine around the tool you buy. A pull-through sharpener lives in a drawer and takes seconds, so it fits a quick monthly check. A guided kit or a stone takes more time and suits a longer session every few months. Whatever you pick, put it where you will actually use it, since a tool hidden in a cupboard is a tool you will not use. A short, regular habit protects your knives and your fingers better than an occasional marathon.
Matching the Tool to the Knives in Your Block
A typical kitchen holds several knife types, and each has different needs. A chef’s knife and a santoku do most of the work and are the main reason to buy a sharpener. A paring knife is small and often awkward in pull-through slots. A utility knife sits between the two. A bread knife has serrations and usually needs a different method.
Edge angle is a key variable. Western-style knives often have a wider angle that tolerates rougher use, while many Asian-style blades have a narrower angle and thinner steel. A single fixed-angle tool is a compromise if you own both styles. If your block holds a mix, consider a tool with two angle options or a guided system where you can set the angle for each knife.
Check blade length against the tool too. Some sharpeners handle long chef’s knives smoothly, while others are better for short blades. Heavy forged knives may need a tool with room for a thick spine. Thin, flexible fillet and boning knives may flex in aggressive slots. Look at the listing for compatible knife types and any warnings. If you have a prized knife, consider testing a new tool on a cheaper one first. Choosing a tool that fits most of your knives well will serve you better than one that fits a single knife perfectly.
Counter Space, Storage and Kitchen Habits
A sharpener has to live somewhere, and the best one is the one that suits your kitchen. Compact pull-through tools slide into a drawer and need no setup. Rolling kits and guided systems take more space and may need a stable surface and a bit of setup before each use. If your counter is crowded, think about a tool that stores easily and does not make a mess.
Consider the process. Some tools produce metal dust or slurry that needs wiping away. Others need water or oil. Think about whether you are happy to deal with that after a long cooking session. A tool that creates too much hassle can end up unused.
Safety at home matters too. If you have children, store the sharpener and knives out of reach. Keep a damp cloth nearby to wipe the blade, and always wash and dry the knife before returning to food prep. Do not sharpen near food that is out on the counter, since metal particles can drift. Use a non-slip mat under bench tools. If you share a kitchen, make it a habit to mention when you have sharpened a knife, because a freshly sharpened blade can cut deeper than people expect. Treat sharp knives with respect, store them properly and protect their edges from clattering in a drawer.
How Aggressive Should Your Sharpener Be
Sharpeners differ in how quickly they remove metal. Coarse abrasives and carbide edges cut quickly and can restore a dull knife in a few strokes, but they also wear the blade faster. Fine abrasives, ceramic and diamond hones cut more gently and leave a smoother edge but take longer on a dull knife. Think of aggression as a trade-off between speed and blade life.
For a good kitchen knife that you want to last, a gentler tool used less often is a sensible approach. For an inexpensive knife that you do not mind wearing, a faster tool may be fine. If you use a more aggressive tool, do so sparingly, only when the knife needs real sharpening, and finish with a fine stage or a hone. The post warns that some pull-through designs are aggressive on thin knives, so check the listing for what is claimed.
Look for features that help you keep control, such as visible angle guides, a stable base and a stage that is clearly marked as coarse or fine. Avoid pressing hard to speed things up. If a tool seems to remove too much metal or leaves visible scratches, reduce the number of strokes or switch to a finer option. Over time, you will learn how many strokes each of your knives needs, and that knowledge matters more than any single feature.
When to Consider a Professional or an Upgrade
A manual sharpener can handle everyday maintenance, but some jobs call for more. A knife with a chipped tip, a broken edge or a bent blade needs repair that a home tool cannot provide. In those cases, a professional sharpening service or a skilled friend can restore the shape. Likewise, a blade that has been worn unevenly over years may need reprofiling.
If you find yourself wanting a finer edge or more control, consider upgrading to a stone or a guided kit. Upgrades make sense when you have a few high-quality knives, enjoy the process and are willing to practice. They also make sense if your first tool no longer works well or does not fit a new knife.
Think about the long-term cost as well. A simple tool that you use consistently may be better value than an expensive system that sits unused. Consider replacement parts, such as discs or inserts, and whether the maker supplies them. Keep the knives themselves in mind too. A sharpener cannot make a poorly made knife excellent, though it can make it more useful. Set your expectations by the quality of your knives and your appetite for upkeep, and adjust your tools as your habits develop.
Home Cook Sharpener FAQ
How often should I sharpen my knives?
Home cooks often sharpen a couple of times a year and hone more often.
Is a rolling sharpener worth it?
It gives clear angle control, but works best on straight edges.
Can I use a pull-through on good knives?
Yes, but sparingly, since it removes more metal than a stone.
Do I need different tools for Japanese knives?
Often, yes. Look for a tool with a finer angle.
Should home cooks hone or sharpen?
Honing is a quick upkeep step that realigns the edge, and sharpening removes metal when honing no longer works. Most home cooks hone often and sharpen occasionally.
Does the cutting board affect how often I sharpen?
Yes. Hard boards such as glass or stone dull edges quickly, while wood and softer plastic are gentler. Using a suitable board extends the time between sharpenings.
Can I sharpen a bread knife with a manual sharpener?
Most standard tools are made for straight edges. Serrated blades usually need a tapered rod or a tool the maker says is suitable.
Is it safe to use a pull-through sharpener on a forged knife?
Many are, but fixed angles may not match every knife. Check the listing for compatibility and use the tool sparingly on knives you value.
How do I store knives after sharpening?
Use a block, a magnetic strip or blade guards so edges do not knock against each other. Make sure the knives are dry before storing.
How many strokes should I use?
Follow the maker's guidance, usually a few strokes in a coarse stage and a few in a fine one. Test the edge and add strokes only if needed.
Can sharpening a knife make it unsafe?
A sharp knife is generally safer because it needs less force, but a freshly sharpened knife can cut deeper than expected. Handle it with care.
Simple Sharpness Tests at the Counter
You do not need special equipment to know whether a knife needs attention. A few quick checks tell you where the edge stands, and they help you stop sharpening once the job is done instead of grinding away more steel than necessary.
- Paper test: hold a sheet of printer paper by one edge and slice downward. A sharp knife cuts cleanly without tearing or catching.
- Tomato test: a ripe tomato should part under the weight of the blade with very little pressure. A dull edge crushes or slips off the skin.
- Onion test: a sharp knife slices through the layers without sliding or needing a sawing motion.
- Light test: look at the edge under a bright light. A dull knife can show a thin, shiny line where the edge has rolled or flattened. A well-sharpened one does not reflect light that way.
These checks are rough, but they are repeatable. Run the same test after each session and you will quickly learn what your own preferred level of sharpness feels like.
Safety Habits While Sharpening
Sharpening feels low-risk because the tool does much of the work, but a freshly sharpened blade is more dangerous than a dull one, and the process itself involves pulling or rolling a blade near your hands. Good habits make the task safe.
- Work on a stable, non-slip surface. A tool that slides is an accident waiting to happen.
- Keep your fingers behind the edge and away from the path of the blade.
- Use smooth, even strokes. Forcing the blade is a common cause of slips.
- Do not sharpen with wet or greasy hands, and wipe the knife dry first.
- Store sharpened knives in a block, sheath or magnetic strip, not loose in a drawer.
- Keep children and pets away while you work, and put everything away afterward.
Rinse and dry the knife after sharpening so you do not carry metal dust to the cutting board. If a tool has a hand guard, use it, and if you ever feel unsure about a technique, stop and look at the maker’s instructions.
What Wears Out and What a Sharpener Really Costs
Every manual sharpener has a finite life, and the type of tool determines what wears. A pull-through uses abrasive inserts that slowly lose their bite. A rolling sharpener uses magnetic discs, and its performance depends on the abrasive layer. Stones wear down and dish out, and they need flattening to stay useful.
The cost over time is mostly in how often you use the tool and how aggressive it is. A gentle fine stage used monthly may last for years, while a coarse stage used weekly will wear itself and your knives faster. Some products offer replaceable parts, which reduces long-term cost, and others are simply replaced when they stop working.
When a sharpener stops giving results after several careful passes, check for glazing or wear before assuming the knife is the problem. Clean the abrasive according to the maker’s instructions. If it still does not cut, it is probably time for a replacement. Buying a slightly better tool once is often cheaper than replacing a cheap one repeatedly.
Choosing a Sharpener as a Gift
A sharpener makes a practical gift, but the wrong type can end up unused in a drawer. A little thought about the recipient helps you pick something they will actually reach for.
For a new cook or someone who dislikes fuss, a simple pull-through or rolling sharpener is usually the safest choice because it needs almost no skill. For someone who owns good knives or enjoys hands-on projects, a stone kit or guided system may be more satisfying, though it asks for time and practice. If you do not know what knives they own, pick a tool that works with a range of blades and has clear instructions.
Check how the tool looks and where it will live. A compact model that stores in a drawer is easier to accept than a bulky kit. Pairing the sharpener with a small note about how often to use it helps the recipient avoid overdoing it. A receipt or gift option makes an exchange easy if their knives turn out to need something different.
Setting Up a Small Knife Care Station
Sharpening is easier to keep up when the tools live in one place. Pick a spot near your prep area, such as a drawer or a hook beside the block, and store the sharpener, a honing rod and a clean towel together. A small calendar reminder or a recurring note on the first of the month turns a vague intention into a habit. Keep a damp cloth nearby to wipe metal dust, and a dry one to finish. If your family shares the kitchen, tell everyone where the sharpener goes and that the knives are sharper after a session. A tidy station takes seconds to use and keeps the whole set in better shape.
Frequently Asked Questions
How do I know if my kitchen knife is sharp?
Try slicing a sheet of printer paper or a ripe tomato. A sharp knife cuts cleanly with little pressure, while a dull one tears, slides or crushes. Check the edge under bright light too, since a dull edge can show a thin shiny line.
Why is there metal dust after sharpening?
Sharpening removes a small amount of steel, which appears as fine dust or shavings. This is normal. Wipe the knife with a damp cloth, rinse and dry it, and clean the tool as the maker advises so metal particles do not end up on food.
How long does a manual knife sharpener last?
It varies with the abrasive, how often you use it and how hard your knives are. Light home use can last years. When several careful passes no longer improve the edge, or the abrasive looks worn or glazed, the sharpener has likely reached the end of its life.
Is a scraping sound normal when I sharpen?
A light, steady scraping or grinding noise is normal, since abrasive is removing metal. Loud grinding, skipping or chattering suggests too much pressure, a worn abrasive or a poor angle. Slow down, use lighter strokes, and check the tool’s instructions for the expected feel.
The Short Version
For a ritual, the Horl 2. For a brand-name pull-through, the Chef’sChoice Pronto. For a quick fix, the Rada Quick Edge. For Zwilling knives, the Zwilling Pull-Through. For thin blades, the Chef’sChoice Asian. For control, the Lansky Deluxe. Confirm fit and angle on each current listing before you order.