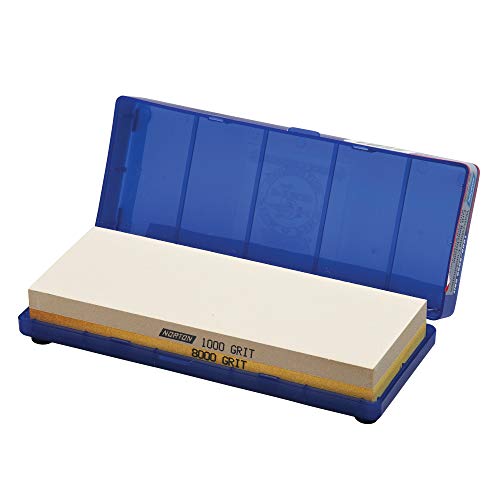
Japanese kitchen knives are usually made from harder steel with a thinner blade and a narrower edge angle than German or American knives. That gives a fine, crisp cut, but it also means the wrong sharpener can chip or round the edge. For that reason, many owners prefer a whetstone, and the better manual tools let you control the angle or are made with a finer angle in mind. Before you buy, work out whether your knives are double-bevel, like most chef’s knives and santokus, or single-bevel, like a yanagiba, because single-bevel blades are sharpened mainly on one side. Japanese steels are often harder, so patience and light pressure protect the edge.
The six picks below include whetstones from Japanese makers, a ceramic water sharpener and a fine-angle pull-through tool. Whetstones take practice but reward you with the best result, while the pull-through tool is faster and easier for beginners. Check your knife’s maker advice and edge angle before you choose, since single-bevel and double-bevel blades are handled differently. If you are unsure, a fine-grit stone and light strokes are the safest route. Confirm details on the current listing. We have not used these products ourselves, so confirm the details on the current listing before you buy.
As an Amazon Associate we earn from qualifying purchases. Links below are affiliate links, and they do not change the product information we give.
What to Look For
| Feature | Why it matters |
|---|---|
| Grit | Around 1000 grit sharpens; 3000 to 6000 refines and polishes |
| Angle | Japanese knives are often ground at a narrower angle than Western ones |
| Stone type | Waterstones cut fast but need soaking and flattening |
| Steel | Hard steels take a fine edge but are brittle, so use gentle pressure |
In this guide
Specs at a Glance
| Sharpener | Type | Grit or stage | Notes |
|---|---|---|---|
| Shun Combination Whetstone | Whetstone | Two grits | Base included |
| Miyabi Sharpening Stone | Whetstone | Single or combination | Soak before use |
| Global Minosharp Ceramic Wheel Water Sharpener | Water sharpener | Ceramic wheels | Fixed angle |
| Tojiro Whetstone | Whetstone | Choose a grit | Soak before use |
| Sakai Takayuki Combination Whetstone | Whetstone | Two grits | Soak before use |
| Chef’sChoice Asian Manual Knife Sharpener | Pull-through | Fine angle | Diamond abrasive |
The 6 Best Manual Knife Sharpeners for Japanese Knives
Top pickBest for shun and other Japanese knives
1. Shun Combination Whetstone
A two-sided whetstone from Shun, a Japanese-style kitchen knife brand. It pairs a sharpening side with a polishing side and usually includes a non-slip base.
Suits: Shun and other Japanese knives. Strengths: two grits in one block and a brand match. Weaknesses: needs practice and soaking. Skip it if you want an instant fix.

Best for miyabi owners
2. Miyabi Sharpening Stone
A whetstone from Miyabi, another well-known brand of Japanese-style kitchen knives. It is intended for the fine edges the brand produces.
Suits: Miyabi owners. Strengths: a brand-matched stone. Weaknesses: check the listing for grit. Skip it if you need a quick tool.
View Miyabi Sharpening Stone on Amazon
Best for global and similar thin blades
3. Global Minosharp Ceramic Wheel Water Sharpener
A manual sharpener from Global, the Japanese knife maker, that uses ceramic wheels and water to refine edges. It is designed around the fine angle of Global knives.
Suits: Global and similar thin blades. Strengths: easy use with matched angle. Weaknesses: less control than a stone. Skip it if you want a coarse tool for chips.
View Global Minosharp on Amazon
Best for home cooks building a stone set
4. Tojiro Whetstone
A whetstone from Tojiro, a Japanese maker of kitchen knives. The stones are widely used with chef’s knives and are sold in a range of grits.
Suits: home cooks building a stone set. Strengths: reasonable value and a Japanese brand. Weaknesses: stones need flattening. Skip it if you want a pull-through.
View Tojiro Whetstone on Amazon
Best for japanese knife enthusiasts
5. Sakai Takayuki Combination Whetstone
A combination stone from Sakai Takayuki, a name tied to the knife-making city of Sakai. It offers a coarse and a fine side in a single block.
Suits: Japanese knife enthusiasts. Strengths: two grits and an authentic brand. Weaknesses: needs practice. Skip it if you want a guided tool.
View Sakai Takayuki Whetstone on Amazon
Best for quick maintenance
6. Chef’sChoice Asian Manual Knife Sharpener
A manual pull-through sharpener from Chef’sChoice that is set to a narrower angle suited to Asian-style knives. It is much faster than a stone.
Suits: quick maintenance. Strengths: simple use and narrow angle. Weaknesses: fixed angle. Skip it if you own single-bevel blades.
View Chef’sChoice Asian Sharpener on Amazon
Care and Setup
- Soak waterstones only as long as the maker advises.
- Dry stones fully before storage.
- Strop lightly to remove burrs.
- Wipe the knife with a cloth after sharpening.
- Use a flattening plate on stones that develop a dip.
Mistakes to Avoid
- Using too steep an angle.
- Pressing too hard on hard steel.
- Skipping stone flattening.
- Sharpening single-bevel knives like double-bevel ones.
- Using a coarse pull-through tool on a delicate edge.
Single-Bevel and Double-Bevel Sharpening Differences
The most important distinction for Japanese knives is the bevel. Double-bevel knives, such as most gyuto, santoku and petty knives, have an edge ground on both sides, much like a Western chef’s knife. Single-bevel knives, such as a yanagiba, deba or usuba, have a main bevel on one side and a nearly flat back on the other. The two types are sharpened differently, and treating one like the other can ruin the geometry.
On a double-bevel knife, you sharpen both faces at a similar angle and aim for a symmetrical edge. On a single-bevel knife, you do most of the work on the beveled face, holding it flat against the stone, and only lightly touch the back to remove the burr. The flat back is part of the design, so never grind it with a steep angle or round it over. If you are unsure which type you own, look at the blade from the tip end, or check the maker’s description.
Pull-through tools suit double-bevel blades only, and even then should be a fine-angle model. Single-bevel knives generally need a stone or a purpose-made guide. If your collection includes both types, plan on a stone for the single-bevel and consider a gentler tool for daily upkeep of the others. Matching the method to the knife is more important than the specific brand of sharpener, so confirm the bevel type before you buy any tool.
Stone Grits and a Sensible Progression
Whetstone grit numbers indicate how coarse or fine the abrasive is. Lower numbers remove metal quickly and repair damage, mid-range grits create the working edge, and higher numbers refine and polish. Many Japanese knife owners use a medium stone for regular sharpening and a finer stone for finishing, and a combination stone gives both in one block. A very coarse stone is for repair only and is rarely needed on a well-kept knife.
The right progression depends on the knife’s condition. If the edge is only slightly dull, start with a mid-range stone and skip the coarse one. If the knife is chipped or very dull, begin with a coarser stone, then move to a medium and fine one. Each stone should remove the scratches left by the previous one, so avoid jumping too far in grit. Keep the number of strokes consistent on each side.
Finer is not always better for kitchen tasks. A very polished edge can feel smooth on boneless fish or vegetables but may feel less biting on tomato skin or tougher foods. Some cooks prefer a slightly toothy edge from a medium grit for general use. Check the manufacturer’s advice for your knife, since the steel and the intended use can change what works best. As the post says, a combination stone around the 1000 and 6000 range is a common starting point, but confirm grit details on any listing.
Soaking, Flattening and Stone Care
Many whetstones need water, and some need soaking first. Follow the manufacturer’s directions, since stones differ. Soaking until the bubbles stop is common advice for some types, while others should only be splashed. Overlong soaking can harm certain stones, and no soaking at all can make them cut poorly. Keep the surface wet during sharpening, adding water when the slurry dries, because the slurry is part of what cuts.
As you work, the stone wears unevenly and develops a dip. A dished stone makes it hard to hold a steady angle and can round the edge. Flatten the stone periodically with a flattening plate or another method recommended by the maker. Check flatness by drawing pencil lines across the surface and rubbing the stone on the plate until the lines disappear evenly.
A stable base is essential. A stone that slides is a safety risk. Use a holder, a damp towel or a rubber mat to keep it in place. After use, rinse off slurry and allow the stone to dry fully in a ventilated area before storing it. Avoid leaving stones in freezing temperatures when wet, since moisture inside can crack them. Store them in a box or on a shelf away from heavy objects. With care, a good stone will serve for many years, and a clean, flat surface makes every session easier.
Angle Control and Light Pressure on Hard Steel
Japanese knives are often made from harder steel at a thinner edge, which can be brittle if abused. That means pressing hard or using too steep an angle can chip the edge. Light pressure and a steady angle protect the blade. Think of the stone as doing the cutting, with your hand simply guiding.
Find the angle by resting the bevel flat on the stone and then lifting the spine slightly until the edge contacts the surface. A common tip is to stack a few coins or use a small angle guide to see the height of the spine at the desired angle. A permanent marker on the bevel shows where metal is being removed. If the marker disappears only at the very edge or the shoulder, adjust accordingly.
Use full, even strokes along the length of the blade and keep your fingers off the edge. Raise a small burr, a thin lip of metal along the opposite side, which tells you that you have reached the edge. Then flip and repeat on the other side, finishing with lighter strokes. Remove the burr with a few very light passes or a strop. Avoid using a coarse tool on a delicate edge, because it can remove more metal than you want. If you are new to this, practice on an old knife before working on your best blade.
Finishing, Stropping and Everyday Upkeep
A burr left on the edge will fold over in use and make the knife seem dull. Stropping removes it and polishes the edge. Use a leather strop, a piece of smooth leather glued to a board, or a fine ceramic rod if the maker allows. Draw the knife away from the edge with light pressure and a steady angle, and avoid pressing deep into the strop, which can round the edge.
Day to day, good habits reduce the need for sharpening. Use a soft cutting board such as wood or a soft synthetic, avoid cutting on hard surfaces and do not use the knife for bones, frozen foods or twisting cuts. Hand wash the blade, dry it right away and store it in a sheath or a block that protects the edge. Do not throw a fine knife into a dishwasher or a crowded drawer.
When the knife loses its bite, a few strokes on a fine stone or a strop can bring it back before it needs a full session. Keep a simple log of when you sharpened and which stones you used. As your skill grows, you will recognize what each knife needs. If a knife has serious damage, consider a professional service that specializes in Japanese blades. Treat this as a long-term skill, not a one-time purchase, and your knives will reward the care.
Japanese Knife Sharpener FAQ
Can I use a pull-through on Japanese knives?
Only a fine-angle model, and sparingly. A stone is gentler.
What grit should I start with?
Many people begin with a combination stone around 1000 and 6000 grit.
Do I need to soak every stone?
No. Some stones are splash-and-go. Follow the maker’s guidance.
Is it hard to learn?
It takes practice, but it is a rewarding skill.
How do I tell if my Japanese knife is single-bevel?
A single-bevel knife has a visible bevel on one side and a flat back on the other, and the listing or maker's page usually says so. Traditional shapes such as the yanagiba, deba and usuba are typically single-bevel.
Can I use a honing rod on a Japanese knife?
Only if it is suitable for hard steel and the maker allows it. Steel rods can damage hard, thin edges. A fine ceramic rod or a strop is a gentler option.
Do I need a flattening plate?
If you use waterstones, yes. A flat stone helps you hold a consistent angle. Check the maker's advice for each stone.
What angle should I use?
Many Japanese knives are ground at a narrower angle than Western knives. Check the maker's guidance, and match the existing bevel when you can. Avoid making the angle steeper than the knife was made for.
Why is my knife chipping after sharpening?
It may be too much pressure, a steep angle or a burr left on the edge. Use light strokes, remove the burr and avoid hard materials. Persistent chipping may indicate a very hard steel needing gentler use.
Is a pull-through sharpener ever acceptable?
A fine-angle model can work for quick upkeep on double-bevel blades. Use it sparingly and avoid it on single-bevel knives.
How should I store whetstones?
Let them dry completely and keep them in a dry place away from freezing temperatures. A box or shelf protects them from knocks.
Setting Up a Stable Sharpening Station
Good results with a Japanese knife depend as much on the setup as on the stone. A wobbling stone makes steady angles nearly impossible, and a slippery counter makes the whole session unsafe. Before you wet anything, decide where you will work and gather everything within reach.
The stone needs a firm base. A rubber or silicone holder, a dedicated stone base or a damp towel folded flat underneath will stop it from sliding. Place a second towel or a shallow tray under the setup to catch slurry, which is the gray paste of water and steel and stone particles that forms during sharpening. Do not wash that slurry down a drain in large amounts, because stone grit can settle in pipes.
- Keep a small bowl or spray bottle of water close so you can keep the stone wet without stopping.
- Use good overhead or side lighting, which helps you see the bevel and any scratch pattern.
- Stand or sit at a comfortable height with your elbow bent, so your forearm moves freely.
- Have a dry cloth ready to wipe the blade and your hands. Wet fingers on a razor edge are a common cause of cuts.
The Chef’sChoice Asian Manual Knife Sharpener in this guide is a different kind of tool, with fixed guides and no stone holder to manage. A whetstone setup takes more preparation but gives you control over the whole edge.
Maintenance Sharpening Versus Repairing Chips and Reprofiling
Not every sharpening job is the same. Most of the time you are doing maintenance, which means restoring an edge that has gone dull through normal use. This takes little metal off the blade and often needs only a medium or fine stone and a few minutes. Doing it regularly keeps the knife in good shape and avoids heavy work later.
Repairs are another matter. If the edge has a visible chip, a rolled section or a damaged tip, you need a coarser stone to remove enough steel to get below the damage. This is slow, takes patience and wears the blade down, so it is best done only when needed. Reprofiling means changing the bevel angle itself, for instance after a previous sharpener left an uneven or very obtuse edge. It also needs a coarse stone and a lot of careful strokes.
A coarse stone removes metal quickly, so use it with a light touch and check often. After any coarse work, move through finer grits to refine the scratches, as covered in the grit section above. Do not use a coarse stone for routine touch-ups. It wears the knife for no benefit.
If a chip is deep or the blade is valuable, consider whether professional help makes sense. A skilled sharpener can restore a damaged Japanese knife without ruining its geometry, which may be wiser than learning on an expensive blade.
Knife Profiles and the Quirks of Each
Japanese knives come in many shapes, and each asks something slightly different from the sharpener. A gyuto, which is the Japanese take on a chef’s knife, has a long, gently curved edge. You need to keep sharpening strokes sweeping along the curve so that the belly and the tip receive attention in equal measure. A santoku has a flatter profile and a rounded tip, so strokes can be more linear.
A nakiri, a rectangular vegetable knife, has an almost straight edge and a flat profile. This makes it easy to hold flat against a stone, though you have to be careful at the corners. Knives with a thin, narrow tip, such as petty or paring blades, need a light hand because the tip has little steel to spare and can round off quickly.
- For curved edges, work in sections and lift the handle slightly as you reach the tip.
- For thin knives, use less pressure and watch the tip so it does not dig into the stone.
- For longer blades, use the whole stone length so wear is spread evenly across it.
- For single-bevel knives, remember the flat back needs minimal contact, as described in the earlier section.
Short stones are fine for small knives but make long blades harder to manage, since you must sharpen in segments. Check the stone dimensions in the listing against the longest knife you own, and leave a margin so the whole edge fits.
Practicing Before You Touch the Good Knife
Sharpening is a skill that improves with repetition, and it is easy to damage a favorite knife while learning. A sensible plan is to practice first on an inexpensive blade, ideally one with a similar shape and steel, so mistakes cost little. A cheap kitchen knife or a spare blade teaches you how to hold a steady angle, how much pressure to use and how the burr forms and disappears.
Use the edge itself as a learning tool. Draw the knife through a sheet of paper or slice a ripe tomato to compare sharpness before and after a session. Mark the bevel lightly with a permanent marker and take a few strokes. Where the marker disappears shows you where the stone is making contact, which is a quick way to find angle errors. Keep notes of what grit you used, how many strokes and how the knife performed, so you can repeat what worked.
Expect your first sessions to be slow and a little frustrating. Most people get consistent results after a handful of attempts, and the hands remember the angle surprisingly quickly. When you feel ready, move to your better knife with the same routine, taking it easy on pressure and checking progress often.
Frequently Asked Questions
How often should I sharpen a Japanese knife?
It depends on how much you cook and what you cut. Home cooks might sharpen on a stone every few months, with light touch-ups between if the edge starts to feel less crisp. Sharpen when the knife begins to slip on tomato skin or crush instead of slice, rather than on a fixed schedule.
What should I put under a whetstone to stop it slipping?
A rubber or silicone stone holder, a dedicated base or a damp folded towel works well. The goal is a firm surface that does not move during strokes. Never sharpen on a bare, wet counter without a base, since a sliding stone is both frustrating and dangerous.
Can I use one stone for both Japanese and Western knives?
Yes, a good stone works for both, but the sharpening angle differs. Japanese knives usually take a finer angle than many Western blades. Check each knife’s bevel and adjust the angle, and avoid using whetstones on serrated knives, which need specialized tools.
How do I know I have raised a burr?
A burr is a thin wire of steel that forms along the edge when you have ground the bevel all the way to the tip. Gently drag your thumb across the edge, away from the blade, and feel for a slight catch. When you feel it along the whole length, flip sides and repeat.
The Short Version
For a brand-matched stone, the Shun Combination Whetstone. For Miyabi knives, the Miyabi stone. For ceramic wheels, the Global Minosharp. For a value stone, the Tojiro. For Sakai tradition, the Sakai Takayuki. For a quick pull-through, the Chef’sChoice Asian.