Kitchen knives work harder than most tools, and manual sharpeners are a popular way to keep them in shape. They are quiet, travel well and remove metal slowly, so a good knife can last for years. The right tool depends on how much time you want to spend. A guided kit gives control, while a stone offers the best result for those willing to practice. Whatever you choose, plan on a few practice sessions on an old knife, because steady strokes and a consistent angle matter more than force. Wash and dry each knife afterward, and test the edge by slicing a sheet of paper or a ripe tomato. Over time you will learn how your own knives respond and how often they need attention.
The six picks below cover bench stones, a guided kit, a rolling sharpener and a couple of pull-through tools. Compare edge angle, grit and size, and make sure the tool matches the knives you own most often. A good routine is to hone often and sharpen only when the edge no longer responds to honing. Replace worn abrasives when they stop cutting, and keep a small cloth nearby to wipe slurry and metal dust from the blade as you work. Confirm details on the current listing. We have not used these products ourselves, so confirm the details on the current listing before you buy.
As an Amazon Associate we earn from qualifying purchases. Links below are affiliate links, and they do not change the product information we give.
What to Look For
| Feature | Why it matters |
|---|---|
| Grit | Coarse grit repairs a dull edge; fine grit polishes |
| Angle | Guided systems hold a set angle for consistent results |
| Base | A stable base keeps the stone from sliding |
| Size | Large stones are easy to use; small tools tuck away |
In this guide
Specs at a Glance
| Sharpener | Type | Style | Notes |
|---|---|---|---|
| Norton India Combination Stone | Bench stone | Coarse and fine | Oil or water-based use |
| DMT Dia-Sharp Diamond Bench Stone | Diamond bench stone | Fine or coarse grit | Flat surface |
| Work Sharp Guided Sharpening System | Guided system | Interchangeable plates | Angle guide |
| Chef’sChoice Pronto Manual Diamond Hone | Pull-through | Two stages | Diamond abrasive |
| Horl 2 Rolling Knife Sharpener | Rolling sharpener | Magnetic holder | Diamond and ceramic discs |
| Smith’s Tri-Hone Sharpening System | Bench stones | Three stones | Rotating base |
The 6 Best Manual Knife Sharpeners for Kitchen Knives
Top pickBest for shop and kitchen knives
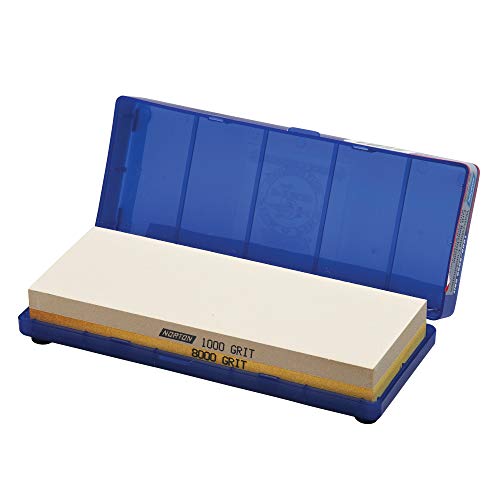
1. Norton India Combination Stone
A bench stone from Norton with a coarse side and a fine side. Oilstones like this are tough and long-lasting, and they are a traditional choice for shop knives.
Suits: shop and kitchen knives. Strengths: long life and a simple design. Weaknesses: needs oil and care. Skip it if you prefer a pull-through.
View Norton India Stone on Amazon
Best for users with hard-steel knives
2. DMT Dia-Sharp Diamond Bench Stone
A diamond bench stone from DMT, a maker known for diamond abrasives. It cuts quickly and stays flat, so it suits hard steels.
Suits: users with hard-steel knives. Strengths: fast cutting and no soaking. Weaknesses: can be aggressive. Skip it if you want a very fine finish.

Best for hobbyists
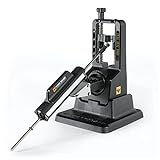
3. Work Sharp Guided Sharpening System
A guided manual kit that holds the blade at the angle you choose. It suits cooks who want repeatable results.
Suits: hobbyists. Strengths: guided angles. Weaknesses: extra setup. Skip it if you want a quick fix.
Best for everyday kitchen use
4. Chef’sChoice Pronto Manual Diamond Hone
A manual pull-through sharpener from Chef’sChoice with two stages and diamond abrasive. It sits on the counter or in a drawer.
Suits: everyday kitchen use. Strengths: easy use. Weaknesses: fixed angle. Skip it if you want to set your own angle.
View Chef’sChoice Pronto on Amazon
Best for cooks who like precision
5. Horl 2 Rolling Knife Sharpener
A rolling sharpener that holds the knife by a magnet at a set angle. It has a reputation for neat results and a well-built design.
Suits: cooks who like precision. Strengths: clear angle control. Weaknesses: best for straight edges. Skip it if you want the simplest option.

Best for workshop and kitchen knives
6. Smith’s Tri-Hone Sharpening System
A bench system from Smith’s that holds three stones in a rotating base. It lets you move from coarse to fine without changing stones.
Suits: workshop and kitchen knives. Strengths: several grits in one base. Weaknesses: bulky for small kitchens. Skip it if you want a compact tool.

Care and Setup
- Clean stones with a brush after use.
- Flatten stones when a dip develops.
- Dry all parts fully before storing.
- Keep guided kits in their case.
- Mark the angle you use so repeat sessions stay consistent.
Mistakes to Avoid
- Skipping the finer stage.
- Pressing too hard on the blade.
- Using the wrong oil on an oilstone.
- Rushing the learning curve.
- Applying uneven pressure across the stone.
Oilstones, Waterstones and Diamond Plates Compared
Bench sharpeners fall into three main families, and each behaves differently. Oilstones, such as the traditional bench stone in this guide, use a light oil to float away metal particles. They are durable, wear slowly and stay flat longer, but they cut more gently and leave an oily residue. Waterstones use water and cut faster, producing a fine edge, but they wear faster and need flattening. Diamond plates use diamond particles bonded to a metal plate, cut very quickly, need no soaking and stay flat, which suits hard steels.
Think about the mess and the upkeep. Oil needs care and cleaning, and you should not switch a stone from oil to water if it has been used with oil. Waterstones need water on hand and, for some types, soaking. Diamond plates are easy to rinse but can feel aggressive, and a very coarse plate can scratch a blade if used carelessly.
Consider your knives. Softer, simpler steels respond well to any of the three. Harder steels are happy on diamond and on good waterstones. If you only want one stone, a combination stone with a coarse and a fine side covers most needs. Look at the listing for the grit, the size and whether the stone is meant for oil or water. Choosing the right family up front avoids frustration and wasted effort when you set up your first sharpening station.
Grit Progression and How Many Stones You Need
Grit describes how coarse or fine an abrasive is, and the numbers matter less than the logic behind them. A coarse grit repairs damage and reshapes the edge, a medium grit sharpens and a fine grit refines. Most kitchens do well with two surfaces, one medium and one fine, because a knife that is kept up rarely needs a coarse repair stone.
A combination stone gives you two grits in one block and keeps cost and storage down. A multi-stone system, such as the rotating base in this guide, lets you move through grits without changing stones, which is convenient but takes space. If you keep your knives in good shape, a simple set is enough. If you inherit a drawer of neglected knives, a coarse stone is worth having.
Each step should remove the scratches from the one before it. If you skip to a very fine grit on a dull edge, you will spend a long time without progress. On the other hand, going too coarse and not following through leaves a rough edge that feels toothy and can wear quickly. Take time at each stage and check the edge on paper or a tomato before moving on. Over time you will learn your preferred grit combination. Always confirm grit information on the listing, since it can vary between versions of the same product.
Guided Systems Versus Freehand Stones
A guided system holds the blade in a clamp at a fixed angle and has you slide a stone along it. It removes much of the guesswork and gives consistent results, which makes it popular with people who want repeatable edges. The drawbacks are setup time and a need to adjust the clamp for different knife lengths and thicknesses. Large chef’s knives can be awkward to clamp, and very thin blades may need special care.
Freehand sharpening on a stone is faster to set up and more flexible. It works with any knife shape and needs only the stone and a stable base. But it requires a steady hand and a feel for the angle, which takes practice. A common tip is to learn on an inexpensive knife and use a marker on the bevel to see where you are removing metal.
You do not have to choose forever. Many cooks start with a guided kit to learn what a sharp edge feels like and then move to stones when they want speed and control. Others stay with a guide for life because it suits their needs. Choose according to how much time you have and how much you enjoy the process. Think too about storage, since guided kits come with several parts that need a case, while a stone only needs a flat place to sit.
Setting Up a Stable Sharpening Station
A little preparation makes sharpening easier and safer. Choose a sturdy work surface at a comfortable height, since a bench that is too low strains your back. Place a damp towel or a non-slip mat under the stone, or use a holder with rubber feet. A stone that slides is one of the most common causes of accidents and poor results.
Gather your supplies before you begin: the stone or kit, water or oil as needed, a cloth to wipe the blade, a small brush to clean the stone and a container for slurry or runoff. Good lighting helps you see the edge and the scratch pattern. If you use a guided system, read the instructions and set the clamp and angle before you start.
Keep a consistent routine. Wet the stone, check that it is flat, then work through your grits. Between stages, rinse the knife to avoid carrying coarse particles to a finer stone. Wipe the blade dry at the end and test it on paper or a tomato. Clean the stone with a brush and let it dry. A tidy, stable setup encourages regular sharpening, so you will keep your knives in good condition instead of waiting until they are frustratingly dull. If counter space is limited, choose a system that packs away easily.
Matching the Method to Different Kitchen Knives
Kitchen knives vary in size, steel and edge angle, so your sharpening method should vary too. A chef’s knife and a santoku are the workhorses and benefit from a consistent angle along the whole edge, including the curve near the tip. A paring knife is small and requires fine control, so a guided clamp or a short stone stroke helps. A utility knife sits between the two. Boning and fillet knives are thin and flexible and need a gentle touch to avoid bending the blade.
Bread knives and other serrated blades are different again. A flat stone does not reach inside the serrations, so they usually need a tapered rod or a tool designed for them. Check the listing before using a stone on any serrated edge.
Consider steel hardness as well. Harder steels hold an edge longer but can be brittle and prefer light pressure and a fine finish. Softer steels sharpen easily but dull faster and may benefit from regular honing. If you own different types, keep track of what each one needs, perhaps with a small note in the kitchen. Learn the angle for each knife from the maker or by examining the existing bevel. Matching your method to the knife prevents damage and gives better results than using one approach for everything.
Kitchen Knife Sharpener FAQ
Which manual sharpener is easiest?
Pull-through tools are the quickest. Guided kits are next.
Do I need oil with a stone?
Oilstones use oil. Waterstones use water. Diamond stones usually use water.
How long does a stone last?
Many last for years with proper care.
Can I sharpen all my kitchen knives the same way?
Mostly, but check the angle for each knife type.
Can I switch a stone between oil and water?
Generally no. A stone used with oil should keep being used with oil, because oil soaks into the pores and prevents water from working properly. Check the maker's guidance for each stone.
Do diamond stones wear out?
The diamond layer wears down over time, especially with heavy use or pressure. Light pressure and regular cleaning prolong life. When the plate stops cutting well, it needs replacing.
What is a burr and why does it matter?
A burr is a thin lip of metal that forms on the edge opposite the side you are sharpening. Feeling it tells you that you have reached the edge. You remove it with lighter strokes or a strop.
How do I clean a sharpening stone?
Rinse or brush off slurry and metal particles. Follow the maker's directions for any special cleaning, and let the stone dry completely before storing it.
Is a coarse stone necessary for kitchen knives?
Only for repairs or very dull knives. If you maintain your knives regularly, a medium and a fine surface are usually enough.
How do I maintain a consistent angle freehand?
Practice with a marker on the bevel, use a simple angle guide or a stack of coins to set the spine height, and keep your wrist steady. Slow, light strokes help.
Can I use my kitchen sharpener on pocket knives?
Often yes, if the knife is a straight edge and the angle is suitable. Check the sharpener's description and avoid serrated or very thick blades unless it says they are suitable.
Edge Angles and Why They Differ Between Knife Traditions
Before choosing a stone or system, it helps to know that kitchen knives are not all ground to the same angle. Many Western-style knives are sharpened at a steeper angle per side, which gives a sturdier edge that tolerates bones, hard squash and rough boards. Many Japanese-style knives are sharpened at a shallower angle, which cuts more cleanly and feels sharper but is less tolerant of abuse. Neither is superior; each reflects the steel and the intended use.
The angle you hold during sharpening should respect the knife’s original grind. Changing it dramatically means removing much more metal, and it takes longer. If you do not know the angle, look for the manufacturer’s guidance, or begin by matching the bevel already on the blade. A permanent marker drawn along the edge shows where the stone is touching. If the ink wears off only at the very edge, the angle is slightly high; if it wears off higher up, it is slightly low.
Consistency matters more than the exact number. A steady, repeatable angle produces a clean apex, while a wobbling one rounds the edge. This is why many beginners do better with a guide at first, then move to freehand once they have a feel for the motion.
Using the Burr to Know You Are Finished
The most reliable way to judge progress is to feel for a burr, a tiny curl of metal that forms along the edge on the side opposite the stone. Once you raise a burr along the full length of one side, the stone has reached the apex of the bevel. You then flip the knife and repeat on the other side. Until the burr appears, the edge is not fully formed, no matter how many strokes you have made.
To check, run a fingertip lightly across the edge, never along it, from the spine toward the cutting side. A burr feels like slight roughness or a catch. Work along the length, because it is easy to raise a burr at the heel and miss it at the tip. Once the burr is consistent, switch to lighter strokes on a finer surface to reduce it. Finish with a few very light alternating strokes, then strop or wipe the edge to remove what remains.
- Raise the burr on one side before flipping the knife.
- Check the full length of the edge, including the tip and heel.
- Reduce pressure as you go to finer surfaces.
- Remove the last burr with light, alternating strokes.
Stropping and Honing Between Sharpenings
Sharpening removes metal, and you do not want to do it often. Maintenance between sessions keeps the edge usable for much longer. Honing with a steel realigns a rolled edge on softer knives, while a leather strop polishes and straightens the very fine edge on harder ones. A simple strop can be a piece of leather glued to a flat board, with or without a fine compound.
Use gentle pressure and move the knife spine-first, drawing it away from the cutting edge, which is the opposite of sharpening strokes. A handful of passes after a few uses can postpone full sharpening for months. If a knife stops responding to stropping, the edge is worn rather than bent, and it is time for the stone.
Troubleshooting Common Edge Problems
Most sharpening problems have simple causes. A knife that feels sharp but tears tomatoes may have a lingering burr or a wire edge that folds over. A knife that will not get sharp even after long work on the stone may never have reached the apex, which means the angle was too low or the stone too fine to cut efficiently. Chips in the edge need a coarser stone and patience, because the whole edge has to be ground back past the damage.
If the edge looks uneven or wavy, you may be applying more pressure at one end of the stroke. Slow down, lighten your hand, and use the full length of the stone. If the stone itself has hollowed out, flattening it restores a true surface, and many makers sell flattening plates for this purpose. A dished stone will round the edge no matter how careful you are.
Handling, Storage and Keeping the Knife Sharp in Use
A sharp edge can be lost quickly in the wrong conditions. Cutting on glass, stone or ceramic plates dulls knives immediately. Wood and soft plastic boards are gentler. Avoid putting knives in the dishwasher, where heat, detergent and knocks against other items damage edges and handles. Wash by hand, dry right away, and store the knives in a block, on a magnetic strip or in blade guards.
Technique also affects how long an edge lasts. Slicing with a smooth stroke is easier on the blade than chopping hard, and scraping food off the board with the sharp edge folds it over. Use the spine for scraping. These small habits stretch the time between sharpening sessions and keep your stones in use less often.
Frequently Asked Questions
How do I find the sharpening angle of my kitchen knife?
Look at the bevel and match it. Color the edge with a permanent marker, make a stroke or two, and see where the ink comes off. If it wears only at the very edge, the angle is slightly high; if higher up, it is low. Manufacturer guidance helps when available.
Should I strop a kitchen knife after sharpening?
Stropping is optional but useful. A few light passes on leather remove leftover burr and polish the edge, which improves cutting feel. Move the knife spine-first with light pressure. It is also a good way to refresh an edge between full sharpenings.
Why does my knife dull so quickly after sharpening?
Common causes are a leftover wire edge that folds over, cutting on glass or stone boards, or an edge that never fully reached the apex. Check for a burr during sharpening, finish with light strokes, and switch to a wood or soft plastic board.
Do I need to flatten my sharpening stone?
Over time stones wear into a dish, and a dished surface rounds the edge. Flattening with a plate or fine abrasive restores a true surface. How often depends on the stone type and use; check it with a straightedge or a pencil grid before sessions.
The Short Version
For a classic bench stone, the Norton India. For hard steel, the DMT Dia-Sharp. For guided control, the Work Sharp Guided System. For a quick pull-through, the Chef’sChoice Pronto. For rolling, the Horl 2. For multiple grits, the Smith’s Tri-Hone.